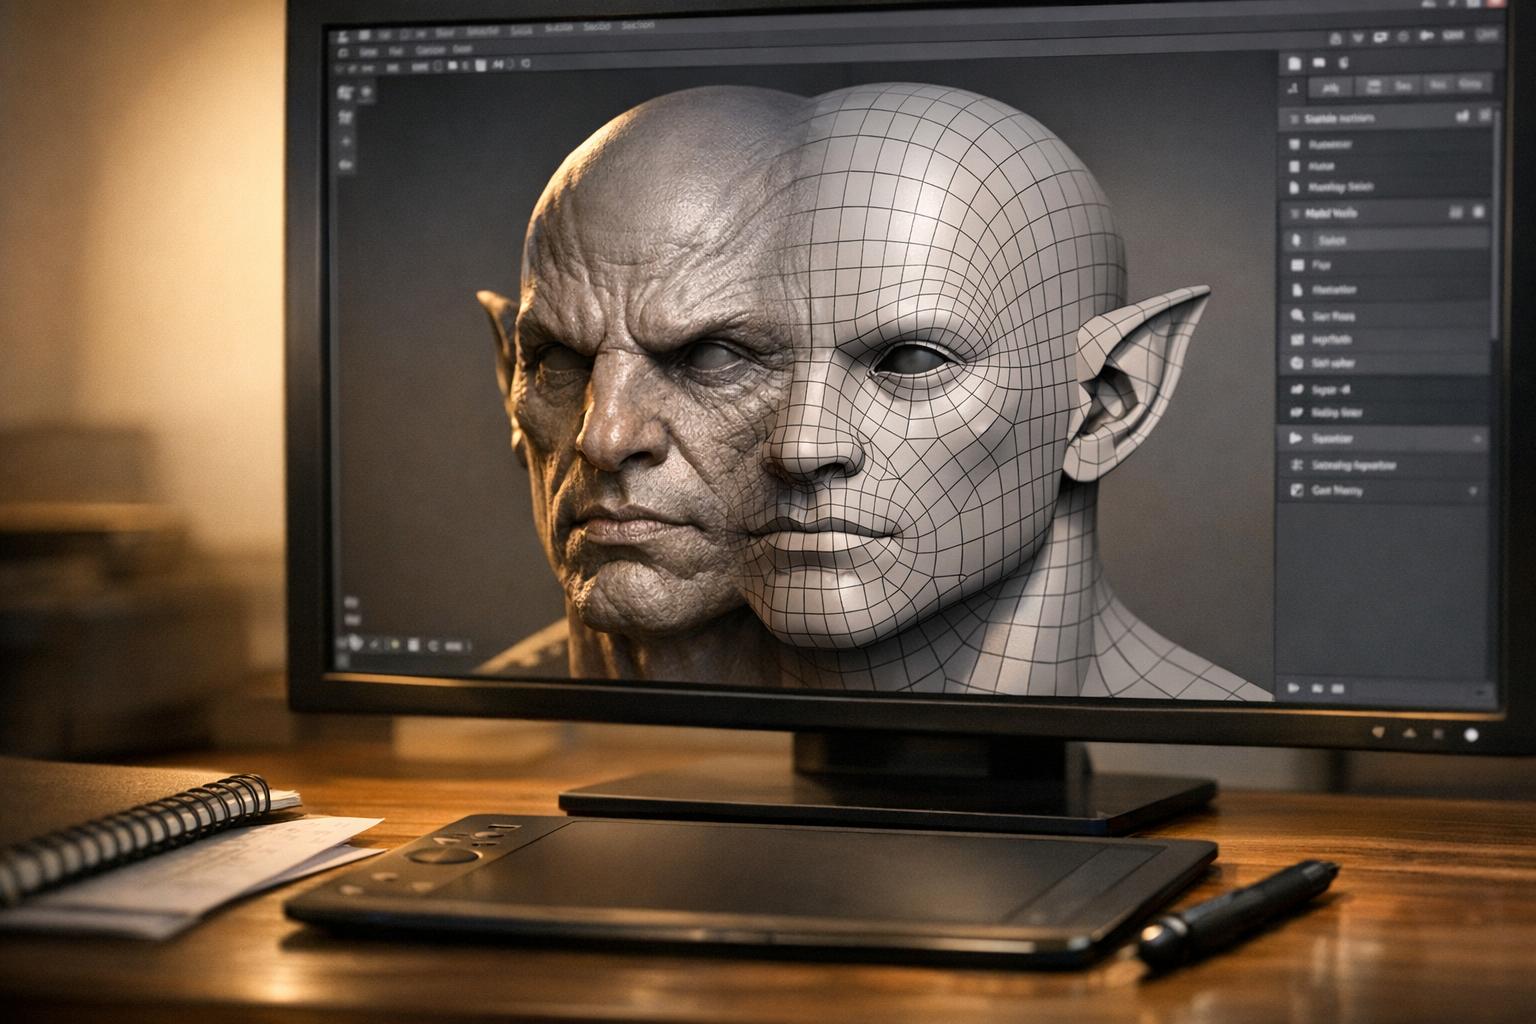
When sculpting in tools like ZBrush or Blender, the output is often a dense, high-poly mesh that’s unsuitable for animation or real-time rendering. Manual retopology fixes this by creating a clean, low-poly mesh with optimized edge flow. This process ensures smooth deformation for animation, reduces performance issues, and makes UV mapping and detail baking easier. Here’s what you’ll learn:
- Why manual retopology is necessary for production-ready models.
- How to prepare your sculpt for retopology by cleaning up details and organizing your workspace.
- Key topology rules, including the importance of quads and proper edge loops.
- A step-by-step workflow for creating optimized meshes for characters, creatures, and props.
- Software-specific tools and hybrid workflows to speed up the process.
Retopology in Blender Tutorial - a guide to retopologize everything
Preparing Your Model for Retopology
Getting your sculpt ready for retopology is all about setting the stage for efficiency. By cleaning up your model, simplifying details, and organizing your workspace, you can make the entire process smoother and more precise. Always refine your sculpt before diving into retopology.
Check and Clean Your Sculpt
Start by stripping away micro-details like skin pores, small scratches, or noise. These finer elements don’t affect the overall shape and are better captured later through normal maps after baking. If you leave them on, your retopo mesh might end up clinging to unnecessary noise instead of following the clean, primary forms. A common approach is to maintain two versions of the sculpt: one with all the fine details for baking and a simplified, decimated version for snapping during retopology.
Next, use your software’s cleanup tools to address common geometry issues. Fix non-manifold edges, inverted normals, and internal faces. Eliminate duplicate meshes or overlapping shells, and close any holes that might interfere with surface projection. Also, apply or freeze transforms to ensure the scale is uniform (typically 1.0) and the rotation aligns with the world axes. This step ensures modifiers like mirror or symmetry behave predictably.
Set Up Your Workspace
Keep your scene organized by grouping the high-poly sculpt, retopo mesh, and reference materials into clearly labeled layers. Lock the sculpt to prevent accidental changes. For characters or props, position the model in a T-pose or neutral pose and align it so the central line - such as the spine, nose, or the center of a hard-surface object - rests on the world origin. This alignment simplifies mirror-based retopology.
Tweak your display settings to make your work easier. Enable X-Ray or In-front display for the retopo mesh so you can see the quads even when they’re inside the sculpt’s silhouette. Use a neutral Matcap or flat shading for the sculpt to emphasize planes and curvature without distracting reflections. These adjustments help reduce visual clutter and improve focus.
Enable Snapping and Symmetry Tools
Snapping tools are essential for aligning new vertices to your sculpt. In Blender, you can enable Snap to Face with Project Individual Elements and Align Rotation to Target; in Maya, tools like Make Live or Quad Draw with surface projection achieve similar results. Adding a Shrinkwrap modifier can also help by keeping your retopo mesh snugly aligned to the sculpt in real time.
For symmetrical models - like characters, vehicles, or props with a clear center line - activate Mirror modifiers or symmetry tools from the start. This allows you to work on one half of the model while automatically mirroring changes to the other side, cutting your workload in half. Just ensure the sculpt’s transforms are frozen and the model is properly centered on the correct axis to avoid misalignment with the mirror plane.
Planning Topology for Sculpted Models
Once your sculpt is polished and your workspace is organized, it’s time to start planning how to translate your design into production-ready geometry. Thoughtful topology planning is key to ensuring your model deforms correctly and maintains its details. Before adding any vertices, take a moment to map out your topology. Good topology ensures even polygon distribution where needed and creates edge flows that align with the form and deformation of your model. Using quads is essential - they subdivide predictably, which is crucial for smooth shading and high-resolution baking. Clean edge flows, like loops following muscles, facial features, or joint bends, help avoid pinching or shading issues during rigging and animation.
Basic Topology Rules
Quads are your best friend when it comes to predictable subdivision and smooth shading. Even polygon density means focusing smaller, denser quads in important areas like faces, hands, joints, and sharp edges, while using larger quads on less critical or hidden surfaces, such as the back of a torso or the underside of a prop. This balance keeps the polycount manageable while preserving the essential shapes of your model. Always adjust your polygon density based on the platform or medium your model is designed for, ensuring efficient subdivisions.
Planning Edge Loops for Different Models
Humanoid characters require circular edge loops around joints and other areas that will deform. For example, the eyes benefit from several rings of quads forming a "mask" that follows the eyelid shape and connects smoothly into the forehead, nose bridge, and cheeks. This setup allows the eyelids to close without collapsing. The mouth needs loops around the lips and nasolabial folds, flowing into the jaw and chin, to support lip sync and expressions. For shoulders and hips, loops should wrap around the joints and follow the muscle structure - like the deltoids at the shoulders and the glutes at the hips - distributing deformation evenly across multiple loops instead of concentrating it on a single edge. Elbows and knees often need extra "support loops" on either side of the joint to help maintain volume during extreme bends.
Creatures follow similar principles but adapt to their unique anatomy. For example, wings require edge loops that flow along the membranes and joints to support folding. Tails and tentacles benefit from evenly spaced circular loops to handle smooth bending and twisting. Creature-specific features like jaws, claws, and spines apply the same joint-flow logic as human anatomy but are tailored to exaggerated or stylized forms.
Hard-surface props have different priorities. Here, edge loops focus on maintaining panel lines, chamfers, and mechanical articulation. Use loops along bevels to preserve sharp edges during subdivision, around hinges or rotating parts for clean mechanical motion, and along cut lines where panels separate. While organic deformation isn’t a concern, using quads and maintaining consistent flow still ensures predictable smoothing.
Common Topology Mistakes to Avoid
Poles - vertices with three or five connected edges - are sometimes unavoidable, but they should be placed in low-deformation or low-visibility areas like flat parts of the skull, the back of the head, or broad planar surfaces. Avoid placing poles near joints, facial expression zones, or sharp silhouettes, as they can cause pinching or shading issues. N-gons (faces with more than four sides) should be avoided entirely. They behave unpredictably under subdivision and can create visible artifacts during animation and baking. To eliminate n-gons, reroute edges using controlled poles or patterns like "diamonds" or "grid-turns".
Be cautious of overly dense meshes, which can harm performance, and avoid under-dense areas that compromise smooth deformation. Poorly directed edge loops can lead to faceting and texture stretching during poses. To catch these issues early, test deformations with a simple rig, temporarily subdivide the mesh to check smoothing, view the model in flat shading to spot uneven density, and rotate it to inspect the silhouette from key angles.
sbb-itb-d35aaa6
Step-by-Step Manual Retopology Workflow
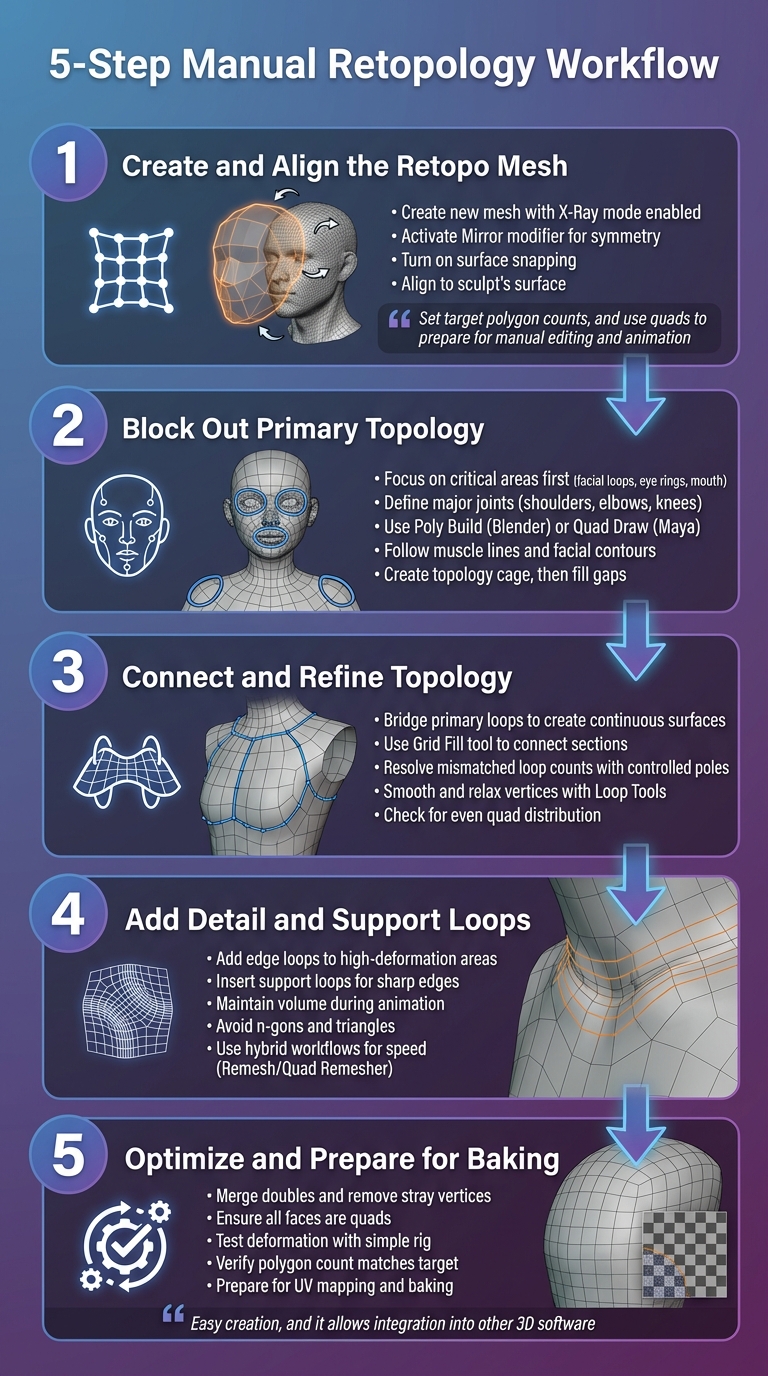
5-Step Manual Retopology Workflow for 3D Sculpted Models
Now that your topology plan is in place, it’s time to dive into building your retopology (retopo) mesh. This process involves five steps, each designed to help you create clean, production-ready geometry. The ultimate goal? Transform your high-poly sculpt into a low-poly mesh that’s optimized for animation and baking.
Step 1: Create and Align the Retopo Mesh
Start by creating a new mesh. Enable X-Ray mode to easily see the underlying sculpt, and activate the Mirror modifier for symmetry. Turn on surface snapping to ensure every vertex sticks to the sculpt’s surface. This keeps your retopo mesh perfectly aligned with the original form. If you’re using AI-assisted tools, you can generate a base mesh with predefined topology settings.
"Set target polygon counts, and use quads to prepare for manual editing and animation." - Sloyd
This initial setup lays the groundwork for defining your primary topology.
Step 2: Block Out Primary Topology
With your retopo mesh aligned, focus on the most critical areas first. These include facial loops, eye rings, the mouth, and major joints like shoulders, elbows, and knees. Tools such as Blender’s Poly Build or Maya’s Quad Draw are great for creating and editing quads. For 3D Coat users, stroke-based options provide flexibility. Start by outlining a topology cage for these key areas, then fill in the gaps. Pay close attention to edge loops that follow muscle lines and facial contours - they’re essential for smooth deformation during animation. For props or hard-surface objects, using a pre-made template with professional edge loops can save time while ensuring quality.
Step 3: Connect and Refine Topology
Once the primary loops are in place, bridge them together to create continuous surfaces. Blender’s Grid Fill tool is particularly useful here. If you encounter mismatched loop counts (e.g., four loops on one side and six on the other), use controlled poles or diamond patterns to resolve them cleanly. Add-ons like Loop Tools can help smooth and relax vertices, improving edge flow. Rotate your model frequently to check for even quad distribution and smooth topology. These refinements are crucial for ensuring the model deforms properly during animation.
Step 4: Add Detail and Support Loops
Next, add extra edge loops to high-deformation areas such as elbows, knees, and the mouth. These loops help maintain volume during animation. For sharp edges, insert support loops to preserve their form during subdivision. Be careful to avoid n-gons and triangles, as they can cause unpredictable issues during subdivision and baking. If you’re short on time, hybrid workflows can help: for example, Blender’s Remesh modifier or a Quad Remesher can quickly block out details, which you can then refine manually. This approach works especially well for props while still allowing for precision in character models.
Step 5: Optimize and Prepare for Baking
Finally, optimize your mesh for performance and baking. Clean up the geometry by merging doubles, removing stray vertices, and ensuring all faces are quads. Switch to flat shading to check for uneven density, and test deformation with a simple rig to identify any problem areas. Confirm that your polygon count matches your target - whether for real-time engines or high-resolution films. Make sure the edge flow supports your intended use. Once everything checks out, your mesh is ready for UV mapping and baking high-poly details onto the low-poly surface. Sticking to quad-dominant topology will make animation smoother and manual adjustments easier down the line.
"Easy creation, and it allows integration into other 3D software." - Mike M., CEO, Animation Studio
Practical Tips and Workflow Variations
Software-Specific Retopology Workflows
Different 3D software tools approach manual retopology in unique ways, each offering specialized features to make the process smoother. For instance, Blender users can take advantage of the RetopoFlow add-on, which provides a set of tools tailored for efficient manual retopology. It simplifies tasks like creating clean edge loops and evenly distributed quads. In Maya, the Quad Draw tool allows you to draw quads directly onto a high-poly sculpt, combining brush-based drawing with automatic edge loop generation. This is particularly useful for intricate organic shapes, such as character faces. 3D Coat, on the other hand, employs a stroke-based system where you can draw curves and polygons on the sculpt, automatically generating quads with adjustable density while keeping the edge flow intact.
Hybrid Workflows Using Procedural or AI Tools
For those looking to combine speed with precision, hybrid workflows can be a game-changer. These methods blend automated tools with manual refinement to optimize efficiency. For example, you can start in Blender with the Remesh modifier or Quad Remesher to create a quad-based mesh quickly. Then, switch to tools like Poly Build to fine-tune critical areas, such as joints or deformation-heavy regions. Platforms like Sloyd also offer procedural templates or AI-generated models with pre-made topology and UV maps. Import these base meshes into Blender or Maya, where you can focus on refining areas that need extra care. This approach can cut your retopology time by as much as 50–70%, making it a great option for game assets or other time-sensitive projects.
Proven Retopology Tips
Regardless of the tools or workflows you choose, there are a few tried-and-true tips to keep in mind:
- Start with a topology cage: Begin by blocking out the main structure, then add finer details later. This method keeps your workflow organized and manageable.
- Use both solid and wireframe views: Switching between these views helps you check the silhouette and ensure quads are evenly distributed.
- Save your progress incrementally: Retopology is time-consuming, so creating backups can save you from losing hours of work.
- Test deformations early: Apply simple rigs or bend joints to see how well your topology holds up under movement. This can save you from major fixes later.
- Leverage smoothing tools: Blender’s Loop Tools add-on is great for relaxing and smoothing vertices, ensuring cleaner results.
- Inspect your mesh thoroughly: Before finalizing, check for n-gons, triangles, and poor edge flow, as these can cause issues during animation or rendering.
- Use modifiers strategically: Tools like the Shrinkwrap modifier help maintain surface accuracy, while the Subdivision Surface modifier can refine the overall model without losing detail.
Conclusion
Manual retopology transforms dense sculpts into assets ready for production by carefully planning edge loops. This approach aligns with earlier advice on mapping edge loops to ensure smooth deformation. Prioritize defining loops around joints, facial features, and major creases before filling in broader areas. This method minimizes texture stretching, prevents animation issues in workflows like games, films, and 3D printing, and simplifies rigging and UV unwrapping.
Clean, all-quad geometry is key to achieving smooth deformations. For instance, a character's head with chaotic topology might fail during lip-sync animations, while one rebuilt with circular loops around critical features will deform naturally and allow high-resolution details to bake seamlessly into normal maps. Keep polycounts efficient - real-time engines perform best with evenly distributed quads, focusing higher density only where silhouettes shift or joints bend.
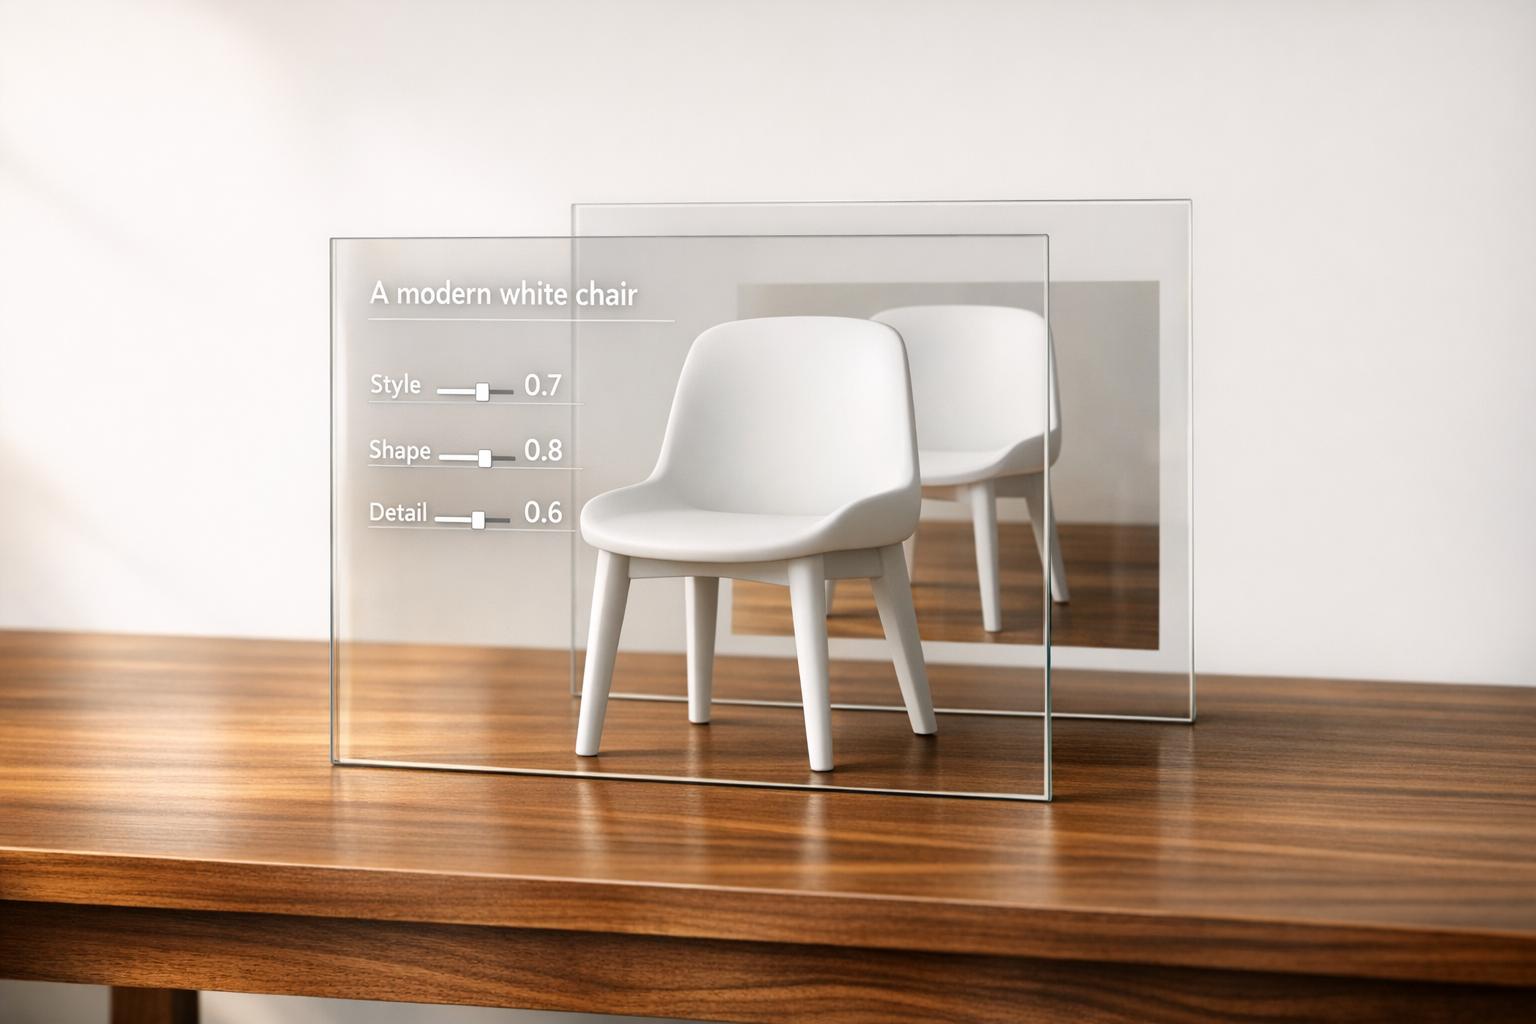
For props and modular assets, tools like Sloyd’s procedural editor can generate game-ready meshes with clean topology and UV maps in seconds. Its AI-driven image-to-3D and text-to-3D capabilities provide quick base meshes, streamlining hybrid workflows and reducing the need for extensive manual retopology.
FAQs
Why are quads preferred over other polygon types in retopology?
Quads are often the go-to choice in retopology due to their ability to create a smoother edge flow, which is crucial for achieving natural deformations in animation. They also behave predictably when subdivided, leading to cleaner and more polished surfaces. Compared to triangles or n-gons, quads reduce visual artifacts and streamline the editing process, making it more efficient and user-friendly.
What’s the best way to use symmetry tools during manual retopology?
When starting your retopology process, it's smart to activate symmetry tools right from the beginning. This lets you focus on just one side of the model, while any changes you make are instantly mirrored on the other side. Using tools like a mirror or symmetry modifier helps maintain clean and consistent topology throughout your work. Be sure to check the symmetry regularly to spot and fix any misalignments early on. This method not only speeds up your workflow but also ensures accurate and symmetrical results.
What are the most common mistakes to avoid during manual retopology?
When tackling manual retopology, there are a few pitfalls you’ll want to steer clear of. First, rushing through the process can result in messy or uneven topology, which can create problems down the line. Pay close attention to edge flow, as it’s crucial for achieving smooth deformation and seamless animation. Another common misstep is neglecting to maintain consistent topology density - this inconsistency can lead to rendering issues or complications when adding finer details later.
It’s also essential to respect the original sculpt’s silhouette, as this preserves the model’s intended shape and overall design. Lastly, always tailor your model to its specific purpose, whether it’s for animation, rendering, or game development. This ensures your work performs well and meets the demands of its final application.