Managing 3D Asset Access for Teams
Role-based access, centralized asset libraries, and regular audits prevent version chaos and protect valuable 3D IP.
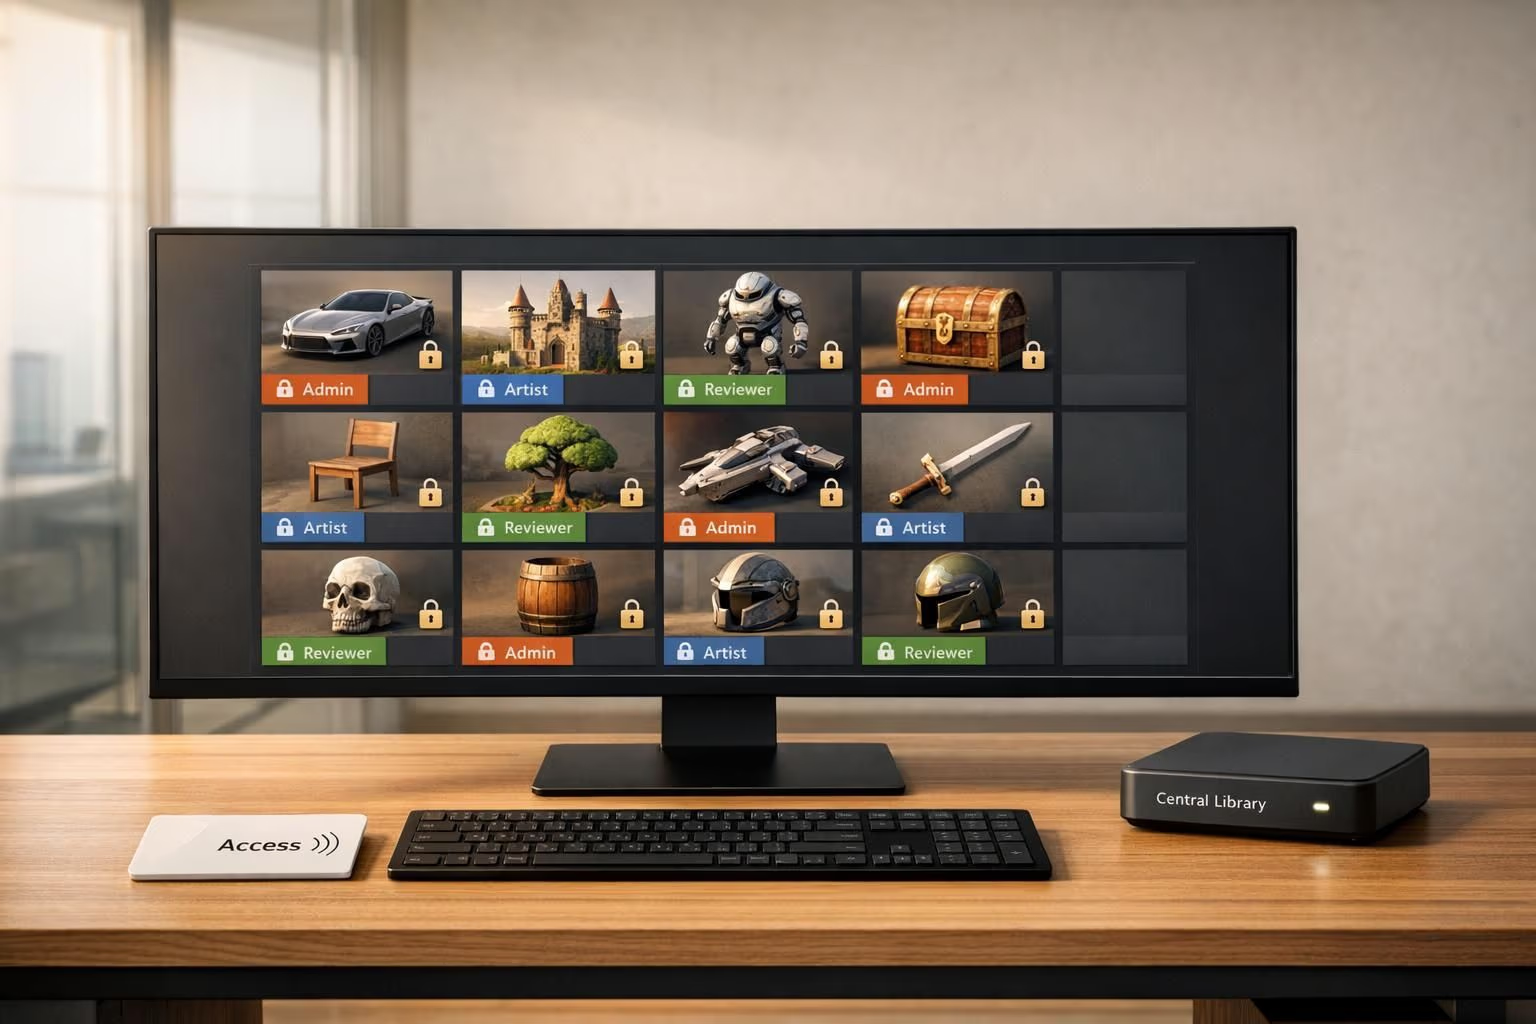
Managing access to 3D assets is critical when working with growing teams, freelancers, or external collaborators. Without proper controls, you risk version chaos, intellectual property exposure, and reduced productivity. Here's how to streamline your workflow:
- Define roles and permissions: Tailor access to specific job functions (e.g., developers need export-ready files, while marketing teams only require rendered images).
- Centralize your asset library: Use a cloud-based system to organize and separate master files (source) from delivery files (optimized outputs).
- Set clear folder structures and naming conventions: Simplify access and prevent misplaced or outdated files.
- Control permissions: Assign view-only, editor, or admin roles based on tasks, and restrict downloads for sensitive files.
- Conduct regular audits: Review permissions quarterly to deactivate dormant accounts, revoke unnecessary access, and monitor admin rights.
Tools like Sloyd can further simplify asset sharing with features like sharable links, JSON import/export, and direct plugin integrations for Unity, Blender, and Unreal. By focusing on organization, access control, and regular reviews, you can reduce errors and keep your workflow efficient.
How to add users to your collection and set & approve access permissions with echo3D
sbb-itb-d35aaa6
Defining Team Roles and Access Requirements
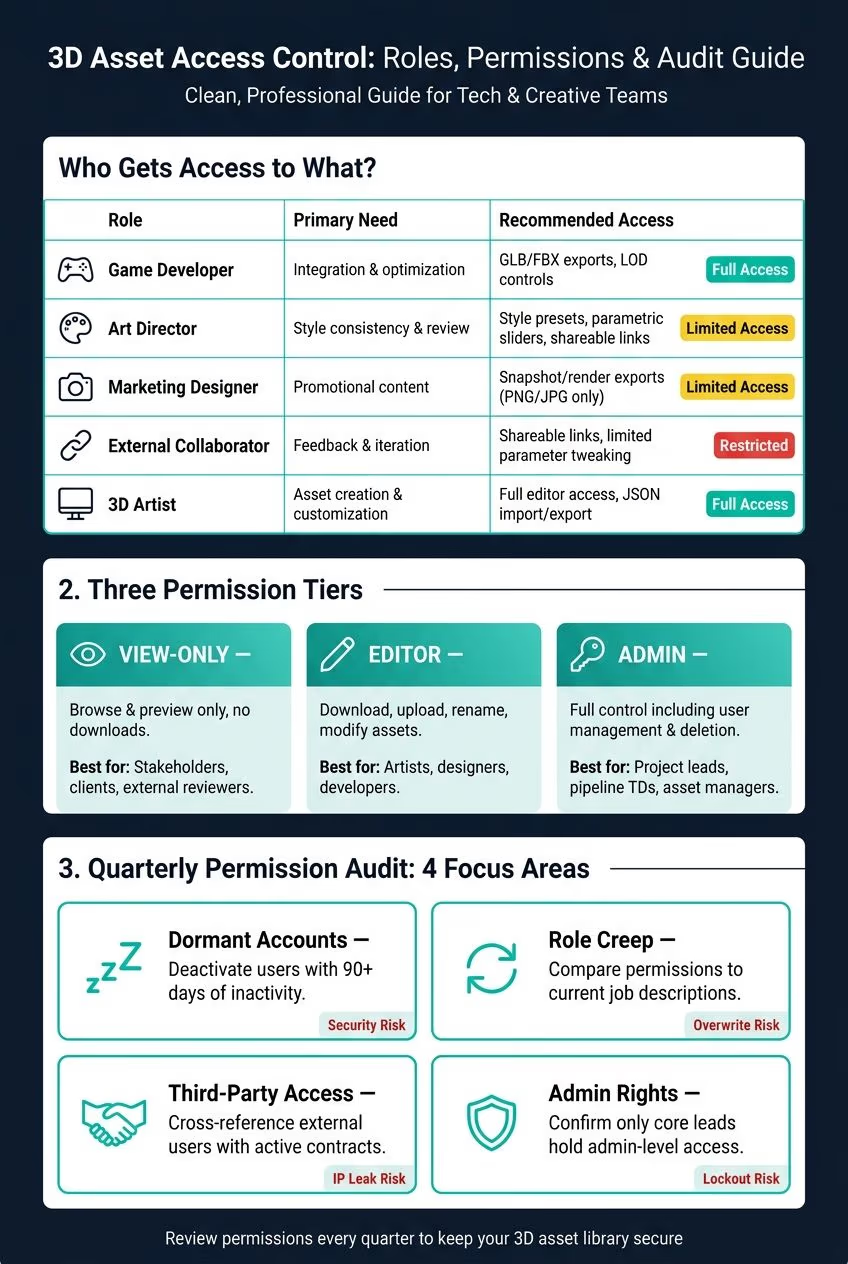
3D Asset Access: Team Roles, Permissions & Audit Checklist
Before setting permissions, it's crucial to understand each team member's role and specific needs. Giving everyone the same level of access can lead to overwrites, accidental asset leaks, and general confusion.
Understanding Team Roles in 3D Workflows
3D projects thrive on collaboration between various roles, each with unique requirements. For example:
- Level builders and game developers need export-ready formats like GLB and FBX, along with clean topology and Level of Detail (LOD) controls.
- Art directors focus on reviewing assets, applying style presets, and making high-level tweaks without needing to dive into complex modeling tools.
- Marketing designers typically require rendered images or snapshots (e.g., PNG or JPG) for promotional purposes, not full access to editable source files.
Additionally, external collaborators - such as freelancers, vendors, or agency partners - should have enough access to contribute effectively but not so much that they can view or modify sensitive parts of the asset library. Clearly defining these roles helps align permissions with actual job functions.
Mapping Permissions to Job Functions
To avoid unnecessary risks, access should be granted strictly based on what each role requires. For instance, a marketing designer doesn’t need access to full FBX files, and a freelance animator doesn’t need visibility into proprietary concept art stored with production assets.
Here’s a breakdown of roles and their access needs:
| Role | Primary Need | Recommended Access |
|---|---|---|
| Game Developer | Integration & optimization | GLB/FBX exports, LOD controls |
| Art Director | Style consistency & review | Style presets, parametric sliders, shareable links |
| Marketing Designer | Promotional content | Snapshot/render exports (PNG/JPG) |
| External Collaborator | Feedback & iteration | Shareable links, limited parameter tweaking |
| 3D Artist | Asset creation & customization | Full editor access, JSON import/export |
For added efficiency and security, use direct engine plugins. These allow developers to pull approved assets into their workspace without needing broader access to the file system. This approach minimizes friction while keeping your asset library secure.
Centralizing and Organizing 3D Asset Libraries
Once team roles are defined and permissions are sorted, the next step is tackling the organization of your asset library. The goal here is simple: make assets easy to find and use. Without a centralized system, teams often save local copies, work with outdated files, or duplicate efforts - leading to inefficiency and confusion.
Why a Centralized Asset Library Makes Sense
A cloud-based Digital Asset Management (DAM) system solves this by giving your team a single, reliable location for approved and up-to-date files. This is especially important for 3D assets, which are far more complex than most file types. A single 3D model isn’t just one file - it’s a collection of elements like meshes, textures, UV maps, materials, and multiple export formats. If these components are scattered across different systems, workflows can grind to a halt.
"Instead of asking, 'Where did we store the model,' the better question becomes, 'How many outcomes can one well-managed asset support.'" - Diego Santos, Technical Blogger, Vivid3D
To streamline your library, divide it into two main categories: Master assets (high-quality source files meant for long-term storage) and Delivery assets (optimized outputs like GLB for web or USDZ for AR). Keeping these categories separate helps avoid costly mistakes, like accidentally publishing a 4K-texture source file for a mobile AR experience where assets should stay under 25 MB.
Setting Up a Clear Folder Structure
One common pitfall for teams is creating overly deep, nested folder hierarchies. This can lead to "folder hesitation" - that moment of uncertainty about where to save a file, which often results in saving it locally instead. A shallow, intuitive folder structure is key.
Adopting a naming convention like ProjectName_AssetType_ProductID_LOD_vVersion brings order to chaos. It clearly identifies the project, file type, product, level of detail, and version. As Diego Santos notes: "Naming conventions look simple, then they quietly save real hours. They also reduce the anxiety of using the wrong file."
Replace vague status labels like final_v2_REAL_FINAL with metadata tags that are easy to understand, such as In Review (still open for feedback) and Approved (ready for publishing). Additionally, store delivery files alongside their master source files and tag them clearly. For teams working with parametric models, exporting and sharing JSON files alongside the 3D mesh is a game-changer. These files capture the full model configuration, enabling any team member to modify the parameters without starting from scratch.
Configuring Permissions and Sharing Controls
Once your assets are organized, the next step is setting up permissions to align with team roles. It's crucial to grant access based on what each role genuinely requires. This ensures that every team member has just the right level of access for their responsibilities and the current phase of the project.
Permission Levels and When to Use Them
Most digital asset management systems and collaboration tools offer three main permission levels. These levels allow you to customize access according to each team member's tasks and responsibilities.
| Permission Level | What It Allows | Best For |
|---|---|---|
| View-Only | Lets users browse and preview assets but restricts downloads | Ideal for stakeholders, clients, or external reviewers |
| Editor | Enables downloading, uploading, renaming, and modifying assets | Suitable for artists, designers, or developers actively working on a project |
| Admin | Grants full control, including managing user permissions and deleting files | Best for project leads, pipeline TDs, or asset managers |
By aligning these permission levels with specific job functions (as discussed in the earlier section on role definitions), you can boost both security and workflow efficiency.
Avoid the temptation to give all users Editor access by default. Doing so increases the risk of accidental overwrites or deletions. A safer approach is to start everyone with View-Only access and upgrade permissions only when their tasks require it.
Restricting Downloads and External Sharing
Not all assets should be downloadable - especially sensitive ones. Files like source materials or unreleased character models require extra precautions to prevent unauthorized access or misuse.
For external sharing, use time-limited, view-only links to maintain control. These links should automatically expire after the review period ends, minimizing potential risks.
For production files, consider using direct plugin integrations with tools like Unity, Unreal, or Blender. These integrations allow assets to be injected directly into scenes, eliminating the need for manual downloads and reducing the chances of files being mishandled.
Reviewing and Auditing Access Permissions
Configuring permissions and sharing controls is a critical first step, but the job doesn’t end there. Regular reviews are key to ensuring your access controls stay aligned with your organization’s needs. Without these reviews, access permissions can easily fall out of sync - roles shift, contractors complete their work, and temporary permissions are often left unchecked. This is how sensitive 3D assets can unintentionally remain accessible to people who no longer need them. This risk is especially high when teams create virtual worlds involving numerous contributors and real-time asset generation.
How to Run Routine Permission Audits
While many teams stick to annual access reviews, leading studios have moved to quarterly audits to stay on top of changes.
"A year is a long period of time. Project team changes, contractor departures, new hires, employee turnover, and reorganisation all have an impact on who needs access to what." - Dharmesh Tolia
Each quarterly audit should focus on four key areas:
- Dormant Accounts: Identify users who haven’t logged into your asset management system for 90 days or more. These accounts are a security risk and should be deactivated immediately.
- Role Creep: Temporary permissions often linger long after a project ends. Compare each user’s permissions with their current job responsibilities and revoke any that are no longer necessary.
- Third-Party Access: Freelancers and agencies are often overlooked during offboarding. Cross-check external accounts against active projects, and revoke access for completed work.
- Admin Rights: Ensure only essential personnel hold admin-level access to prevent unauthorized changes or accidental lockouts.
| Audit Focus | Risk | Required Action |
|---|---|---|
| Dormant Accounts | Compromised inactive credentials | Deactivate users with 90+ days of inactivity |
| Role Creep | Accidental overwrites of approved assets | Compare permissions to current job descriptions |
| Third-Party Access | Post-contract IP leakage | Cross-reference external users with active contracts |
| Admin Rights | Unauthorized permission changes or lockouts | Confirm only core leads hold admin-level access |
Once the audit is complete, leverage your system’s audit logs to gain deeper insights into user activity.
Using Audit Logs to Track Activity
Audit logs act as a detailed record of your system’s activity. They track who accessed specific files, when files were exported, what changes were made, and who altered permissions. Without this record, troubleshooting issues becomes far more challenging.
"Audit logging is the system's memory... This log isn't just for security; it's invaluable for replicating successful results and understanding team workflow patterns." - Tripo AI
These logs are vital for identifying errors and spotting unusual patterns, such as excessive downloads, bulk deletions, or suspicious login attempts. For instance, if a character rig is accidentally deleted, the log can pinpoint the exact user, time, and session responsible, allowing you to restore the file without unnecessary delays. For teams managing extensive libraries, integrating audit logs with tools like Splunk or Datadog enables automated alerts for unusual activity, saving time and reducing manual oversight.
Managing 3D Asset Access with Sloyd
Once you've established a solid audit process, the next step is ensuring your daily asset workflow stays secure. Sloyd helps tackle this challenge by offering specialized tools for managing 3D assets. With Sloyd, you can streamline asset sharing while keeping permissions under control, even with regular audits in place.
Sloyd's Asset Management Features
Sloyd simplifies the way teams share and manage access to 3D assets, offering tools that are both intuitive and effective.
One standout feature is sharable links. When a team member creates or customizes a model in Sloyd's editor, they can generate a unique link. This allows collaborators to preview the asset directly in their browser - no login required. It's perfect for quick feedback loops or securing stakeholder approvals.
Another key feature is JSON import/export. This option lets users capture a model's configuration in JSON format, making it easy to maintain version control within your repository of choice.
| Sharing Method | Best Use Case | Key Benefit |
|---|---|---|
| Sharable Link | Quick reviews, stakeholder feedback | Browser-based previews without login |
| JSON Import/Export | Asset libraries, version control | Complete model configuration for seamless Git integration |
| Direct Plugin "Send" | Production pipeline integration | One-click transfers to Unity, Unreal, or Blender |
For teams working at scale, Sloyd also includes custom studio styles. This feature locks all team-generated assets to a specific visual aesthetic based on your existing artwork. It’s a great way to ensure consistency across projects, especially when working with distributed teams.
Tips for Using Sloyd in Team Workflows
To make the most of Sloyd, install its native plugins for Unity, Blender, or Unreal. These plugins allow you to send assets directly into your active project with a single click. As Sloyd explains:
"Stop managing folders and fighting with import settings. Sloyd's plugins allow you to generate assets in our web app and inject them into your active Unity, Blender, Unreal or your favorite tool scene with the push of a button." - Sloyd
This workflow eliminates the hassle of saving files locally or sharing them through drives and messaging apps - methods that can be difficult to track and audit. By transferring assets directly from Sloyd into your project via the plugin, you keep everything within your authorized tools.
Sloyd offers a free Starter plan with access to core features. For more options, the Plus plan is available for $15/month. Teams with advanced requirements can contact Sloyd for custom Studio & Enterprise pricing.
Conclusion: Keeping 3D Asset Access Secure and Organized
Building a solid system for managing 3D assets involves a few key steps: setting up role-specific access, creating centralized libraries, and conducting regular audits. By defining roles, assigning permissions, centralizing your assets, and staying consistent with audits, you can ensure your team spends more time creating and less time managing files.
And it’s not just about security - it’s about efficiency. As Diego Santos, Technical Blogger at Vivid3D, explains:
"Good management is not bureaucracy. It is what lets creative work move faster with fewer mistakes."
Start small. Test out naming conventions and folder structures on a single project, then expand these practices across your organization. With well-defined roles, organized libraries, and regular permission reviews, your team can shift its focus to what truly matters: producing exceptional creative work. By sticking to these practices, you'll streamline workflows and protect your valuable creative assets.
FAQs
What access should freelancers get?
When collaborating with freelancers in Sloyd, using shareable links can make feedback and edits much faster. These links allow freelancers to view models, tweak parameters, and provide updates - all without needing to log in or download files.
For more extended projects, consider exporting a JSON configuration file. This file can be imported directly into their Sloyd editor, ensuring workflows stay consistent, efficient, and secure throughout the collaboration.
How do we separate master vs delivery files?
To handle your 3D pipeline in Sloyd, rely on JSON files as your primary configuration files and use formats like GLB, FBX, or STL for delivering finished models. JSON files preserve all parametric model settings, making it easier to maintain consistency within your team. Once your models are ready for production, export them in these standard formats to ensure they work seamlessly with game engines, 3D printing software, or design tools.
What should a quarterly permission audit include?
Regular permission audits help ensure that access rights match team responsibilities, reducing potential security risks. Here's how to approach it:
- Review Active Users: Go through all active accounts, including employees, contractors, and vendors. Ensure their access aligns with their current roles.
- Revoke Unnecessary Access: Remove access for anyone who no longer needs it, such as former employees or third-party collaborators.
- Focus on High-Risk Areas: Pay extra attention to privileged accounts and sensitive data, as these are often targeted in breaches.
- Monitor Audit Trails: Look for unusual activity, like bulk downloads or unauthorized access attempts, that could signal a problem.
- Document Everything: Keep a record of your findings and the actions taken to maintain accountability and track changes.
For teams using Sloyd, double-check that only essential members have access to your 3D asset library to keep it secure.