Introduction
You've exported an object from Sloyd, but how do you add custom materials to it? Follow this tutorial to learn how to do it using Blender!
Similar steps can also be done with other 3D tools.
1. Export from Sloyd
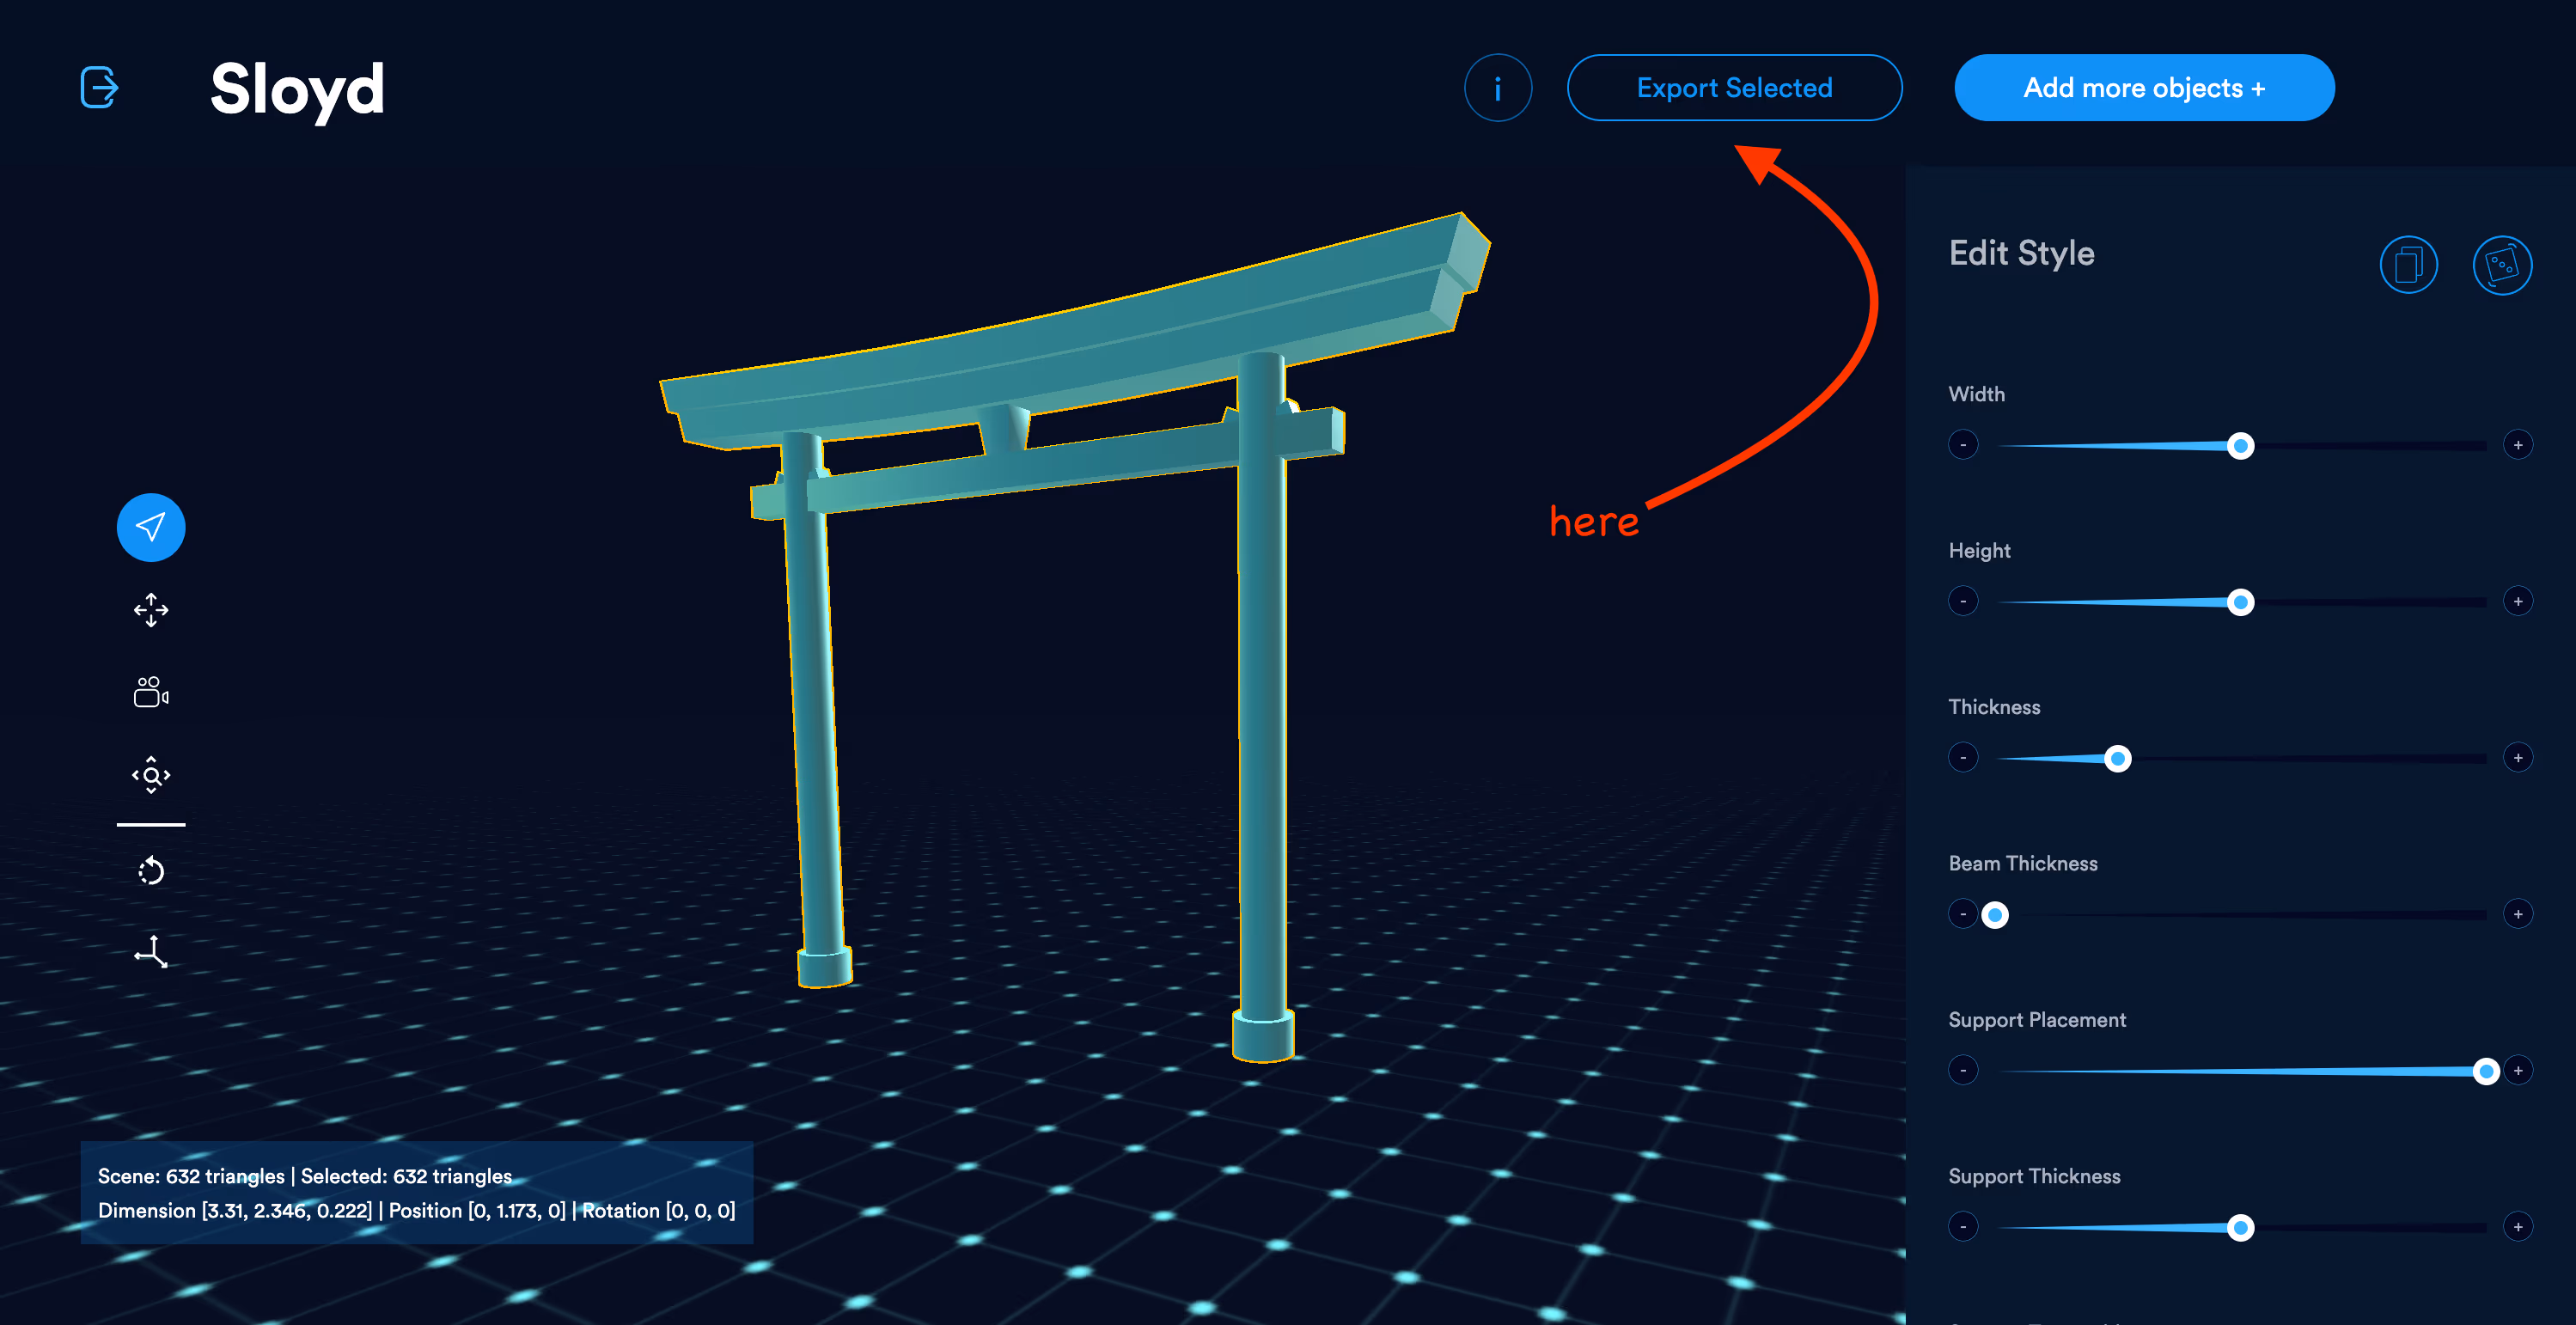
- Select the object with left click
- Click "Export Selected"
If the export button is disabled, it probably means you did not select an object or that you have more than one object selected.
You can choose between two formats:
- .OBJ
- Without materials
- Single object
- .GLB
- Including materials from Sloyd
- Sub-meshes based on the material indexes
In the future we'll have more formats and export of multiple objects at the same time.
2. Import into texturing tool
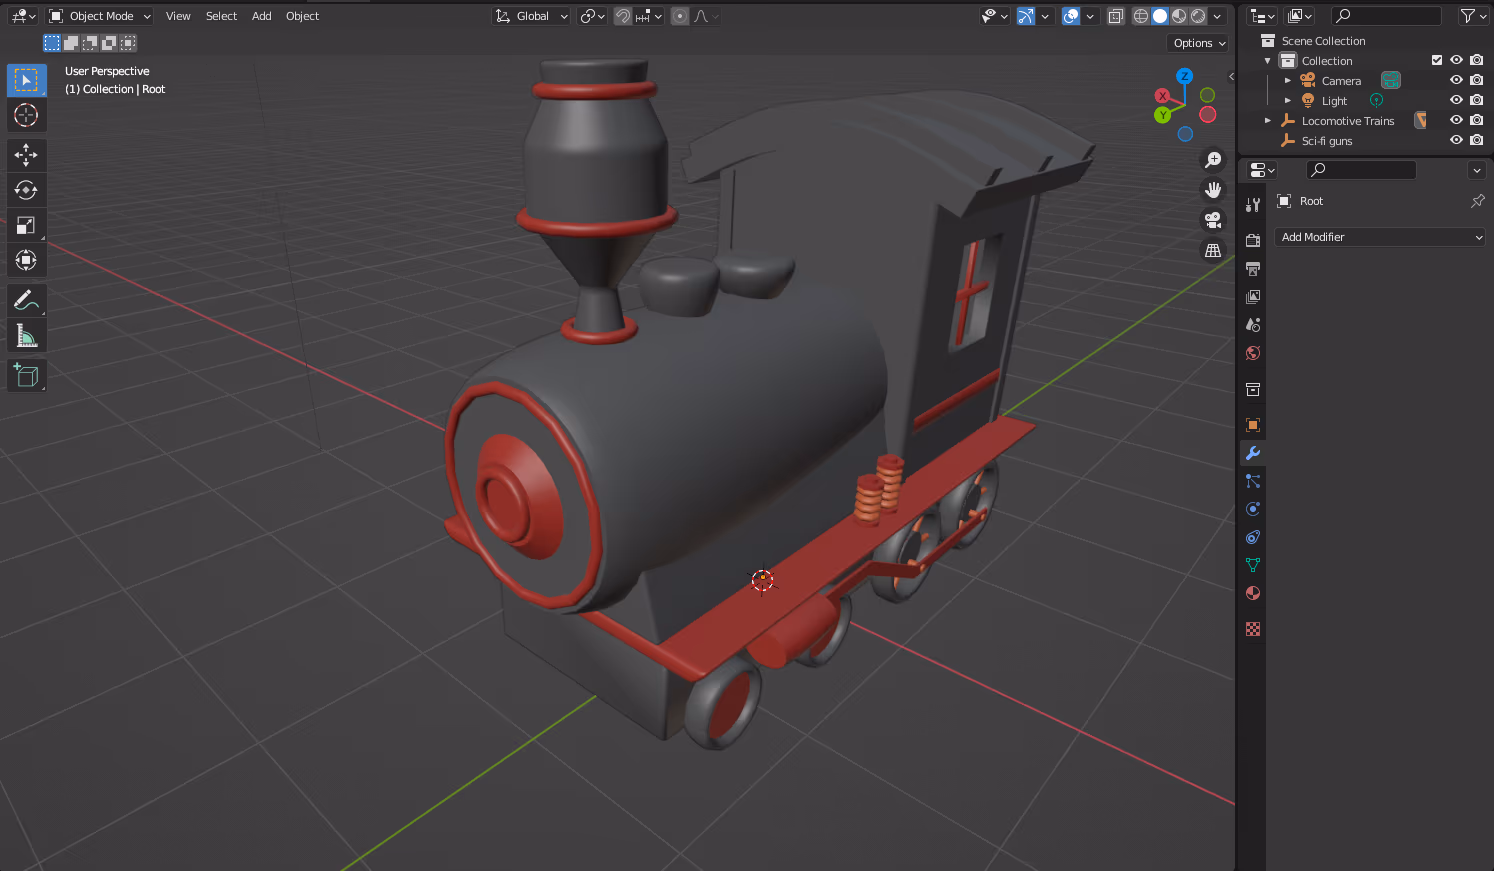
In Blender: Go to File > Import > Wavefront(obj) or GLTF 2.
The object will appear in your 3D view and in the hierarchy. You won't be able to see parts hierarchy but those parts are selectable in edit mode.
GLB exports
GLB exports come with up to 4 materials. You can change each material by applying a texture image or by changing its material properties in any 3D software that supports PBR.
You will find separate layers for the UVs: One for each material.
Lets look at an example in Blender:
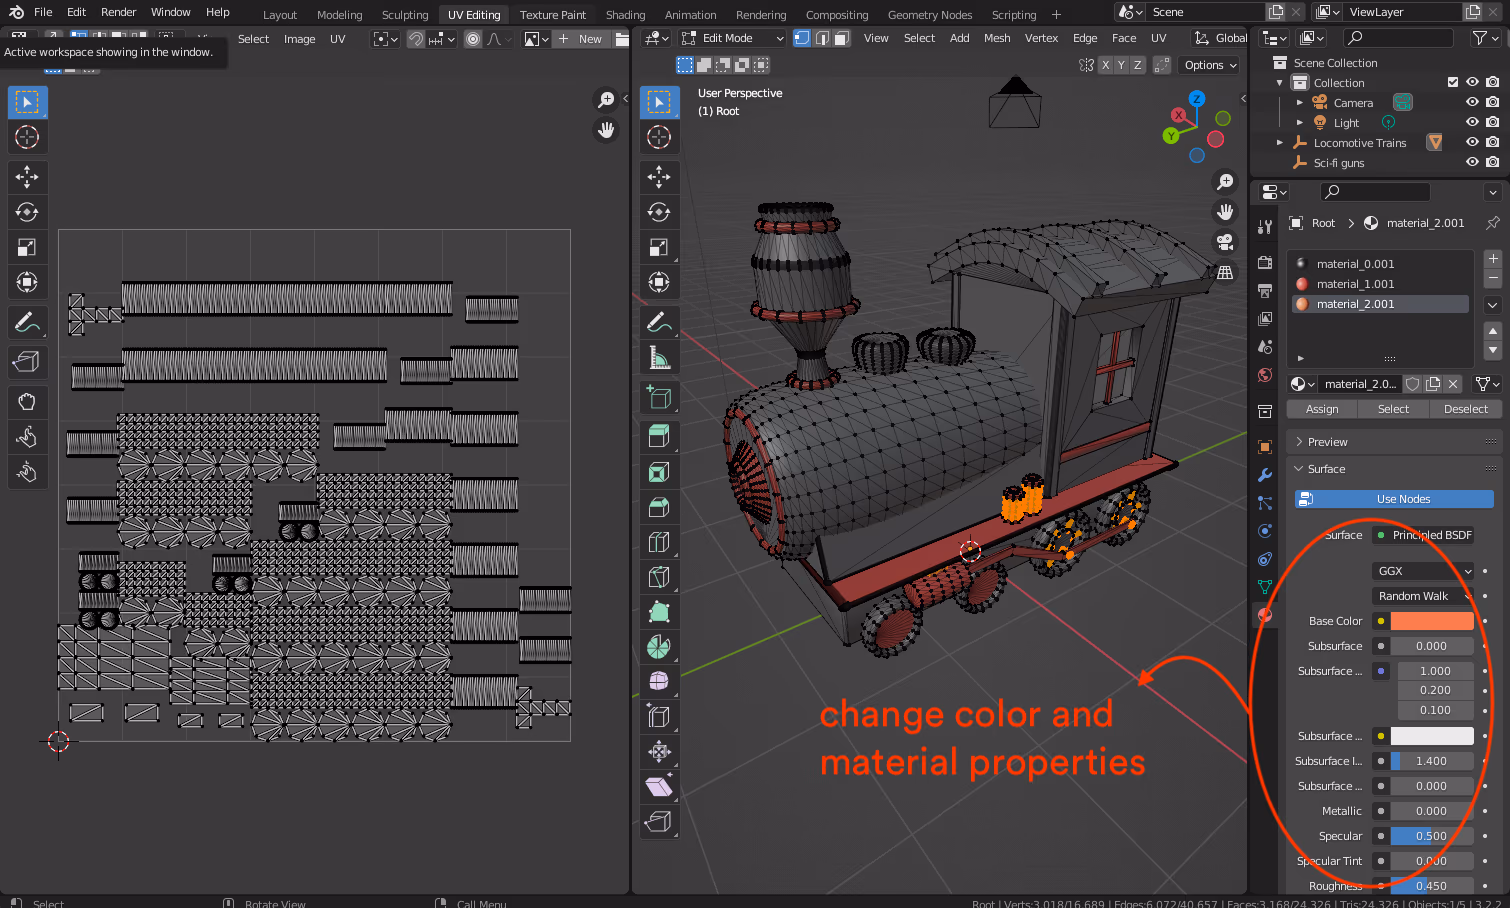
- Go to edit mode
- Open UV editing and you'll see all the UVs layered on top of each other
- Go into the Material tab and deselect all but one material.

- Now you'll be able to see all the shapes of that material without any UV overlaps.
Now you can change the material properties as you wish, using the predefined material groups! This is also where you could add texture images.
You can also select specific faces if you want 🙂 Have fun!
OBJ exports
First, there are a few things you should know about Sloyd objects:
- All objects are made out of separate shapes. Though, those separate shapes are not seen in the hierarchy.
- UV map shapes are proportional: bigger shapes take a bigger area on the UV map. This makes sure bigger objects get textures applied in the correct scale.
- When you select a shape that's part of an object, you need to select each face.
- Unwrap the selected faces before applying textures
This tutorial is not going to go into all the steps of texturing and painting, just the details that are relevant to working with Sloyd objects.
Now that you know that, let's start:
Painting or adding materials to a specific part of the 3D model
There are two options to start painting:
- Color directly on the UV map and see which shapes are colored
- Select the specific shape you want texture or color
This is how the UV map looks like:
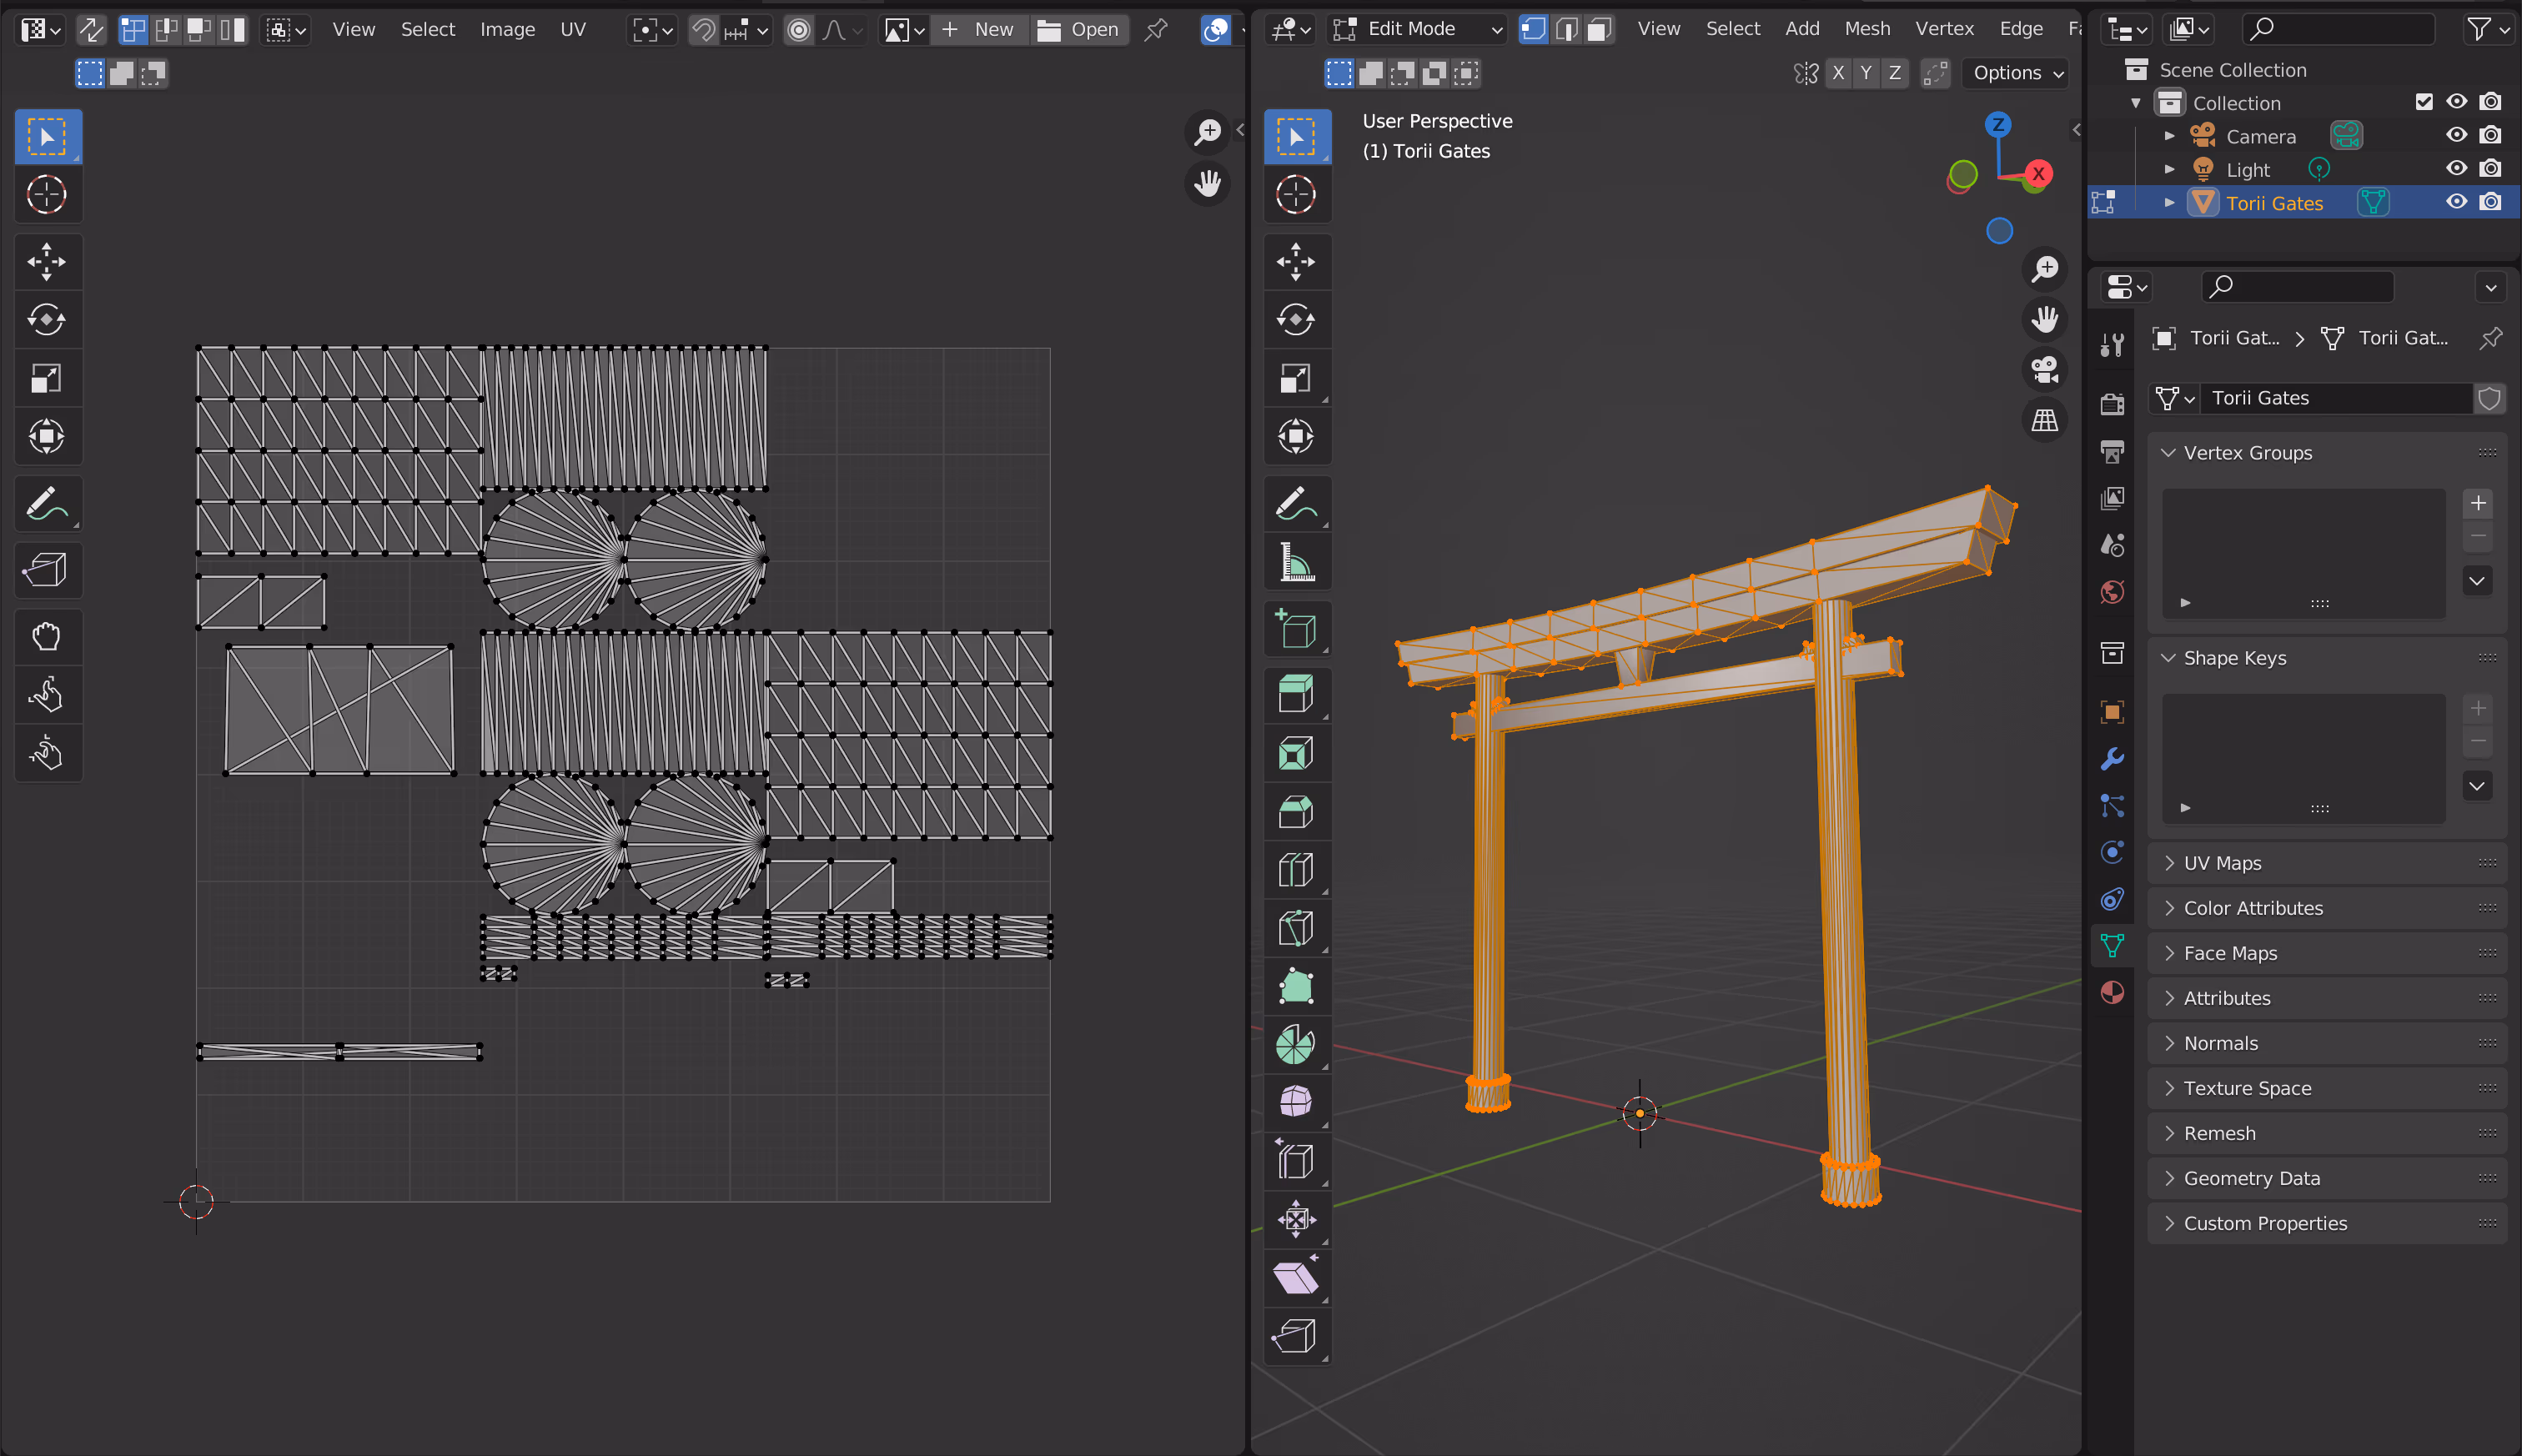
The Torii gate is made out of different primitives: a few cylinders and cubes, and two splines. These are laid out next to each other on the UV map based on the primitive type.
How to select a specific shape to add materials:
- Go to Edit Mode
- Choose 'Face Select' and select the desired faces
- Choose 'Select Linked'
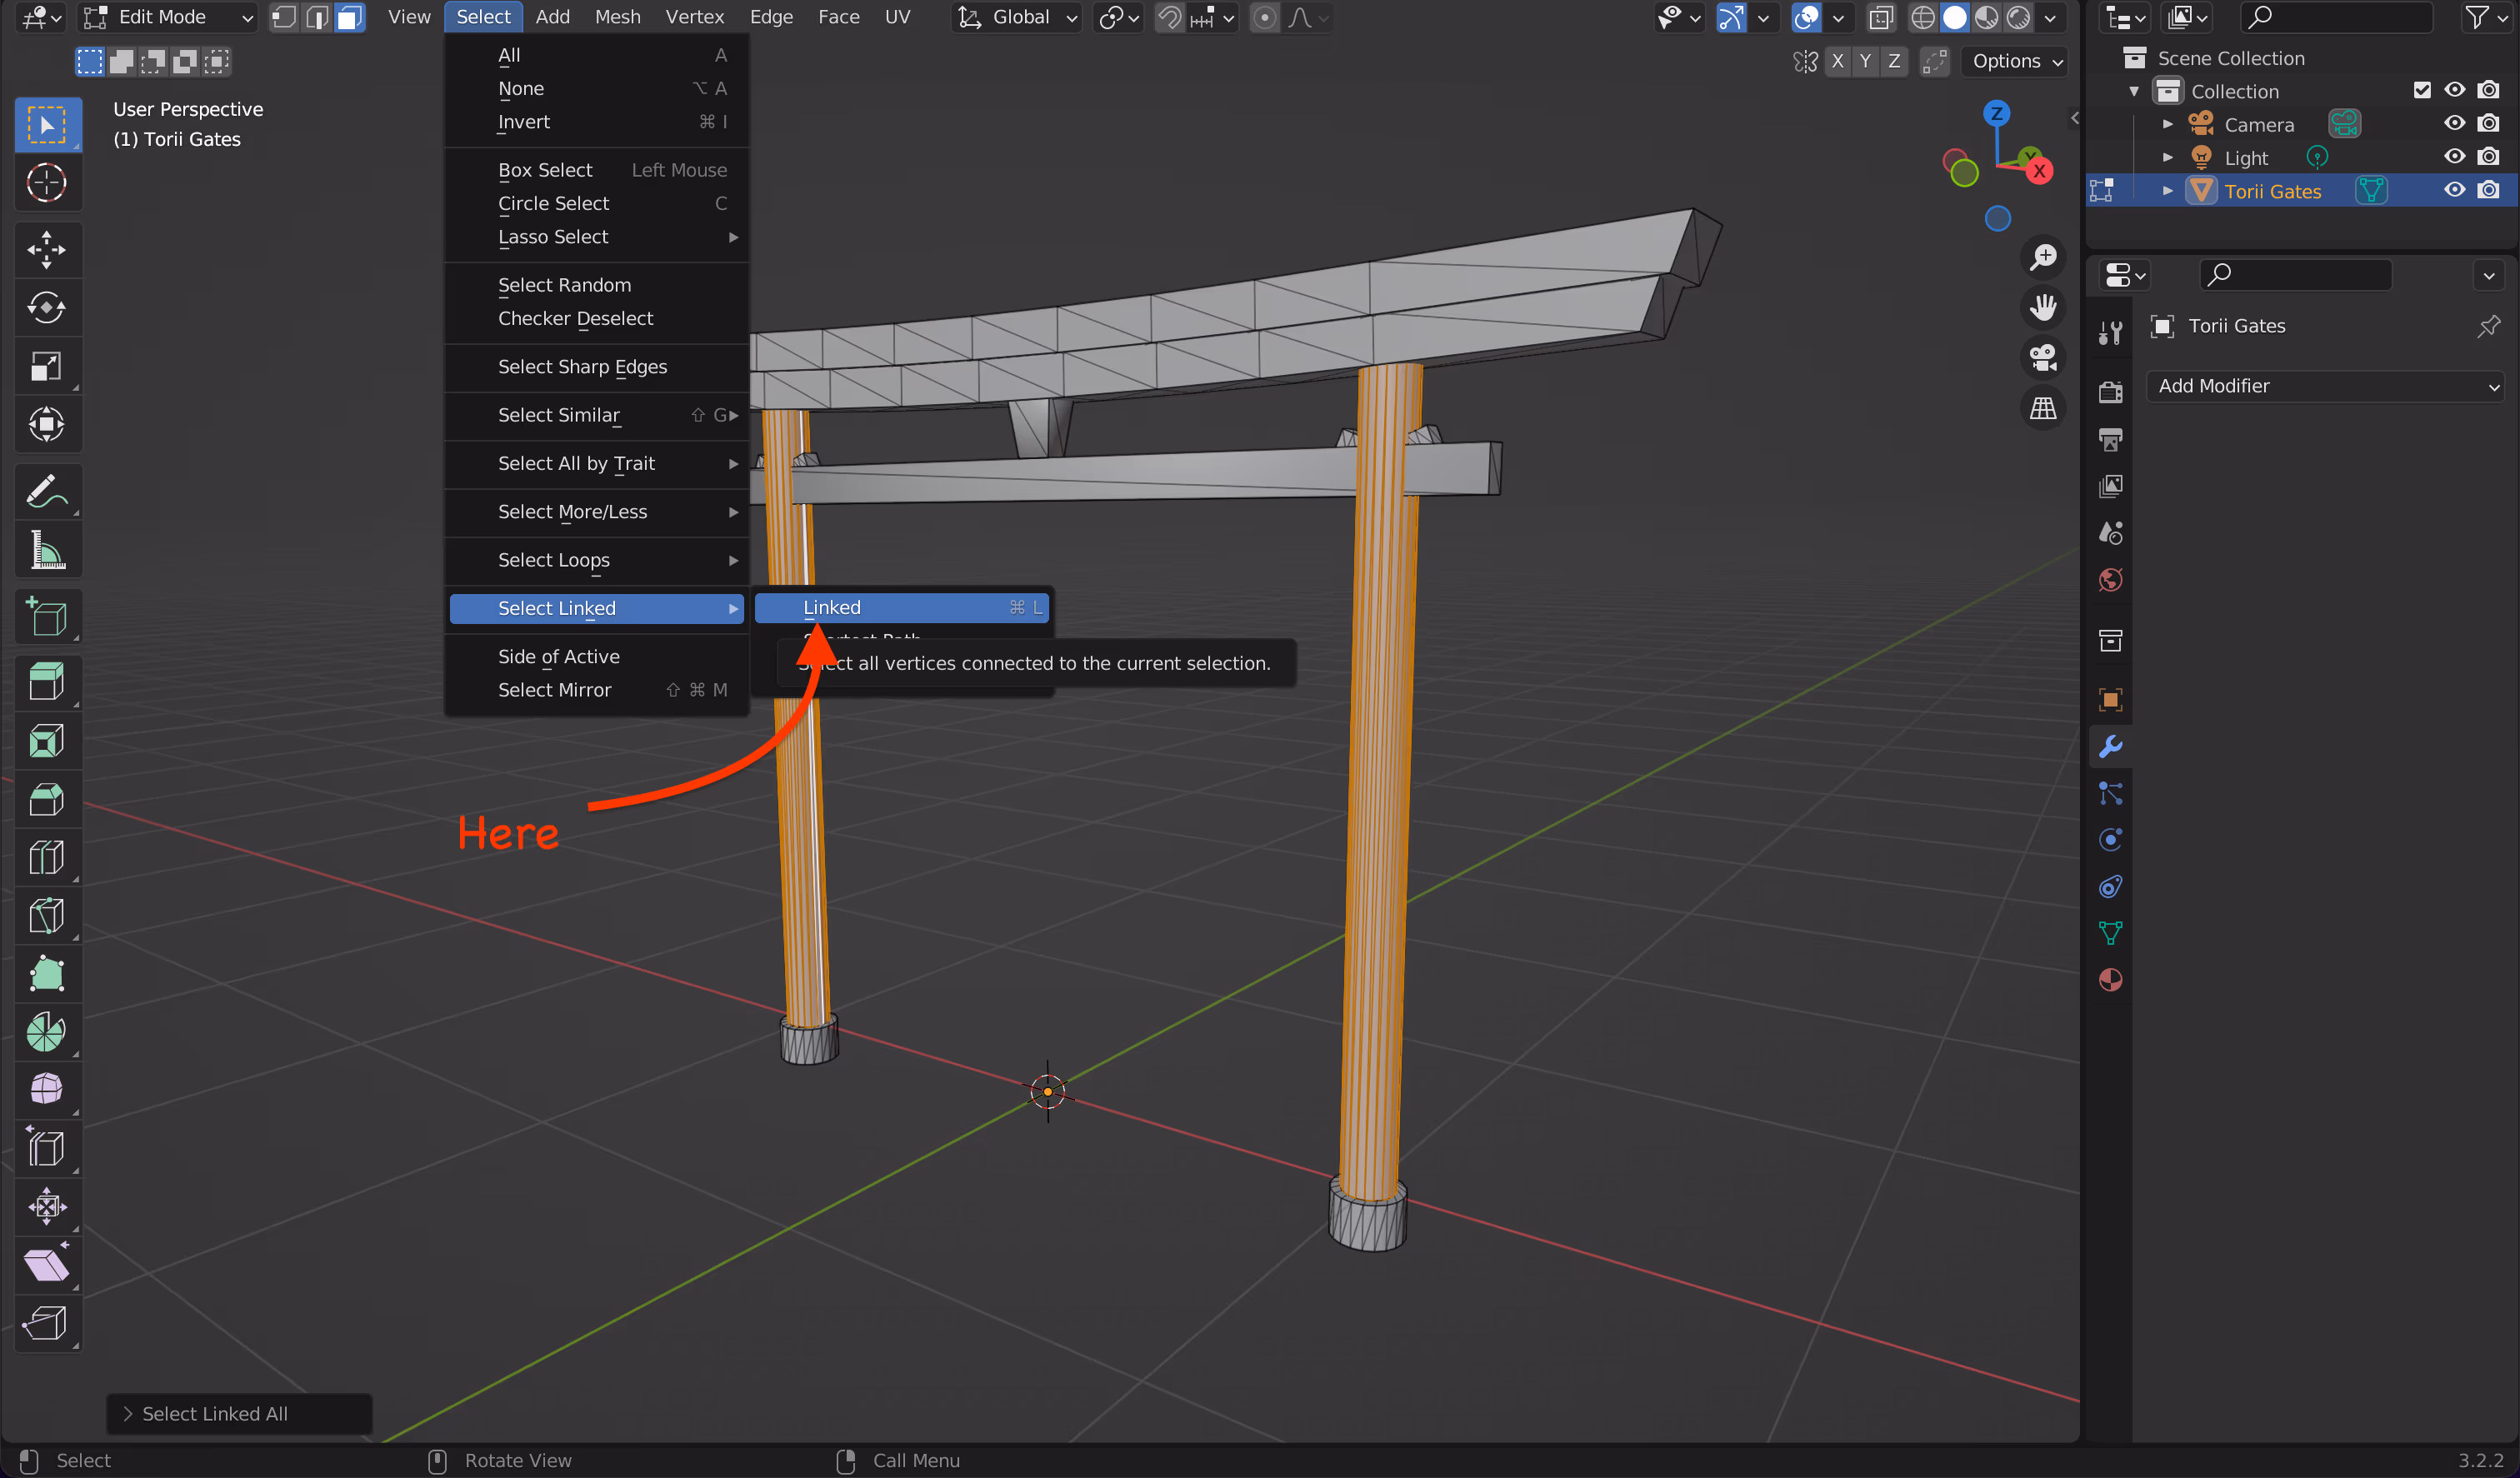
Now you can paint, apply materials or image textures, or use material nodes on the selected faces.
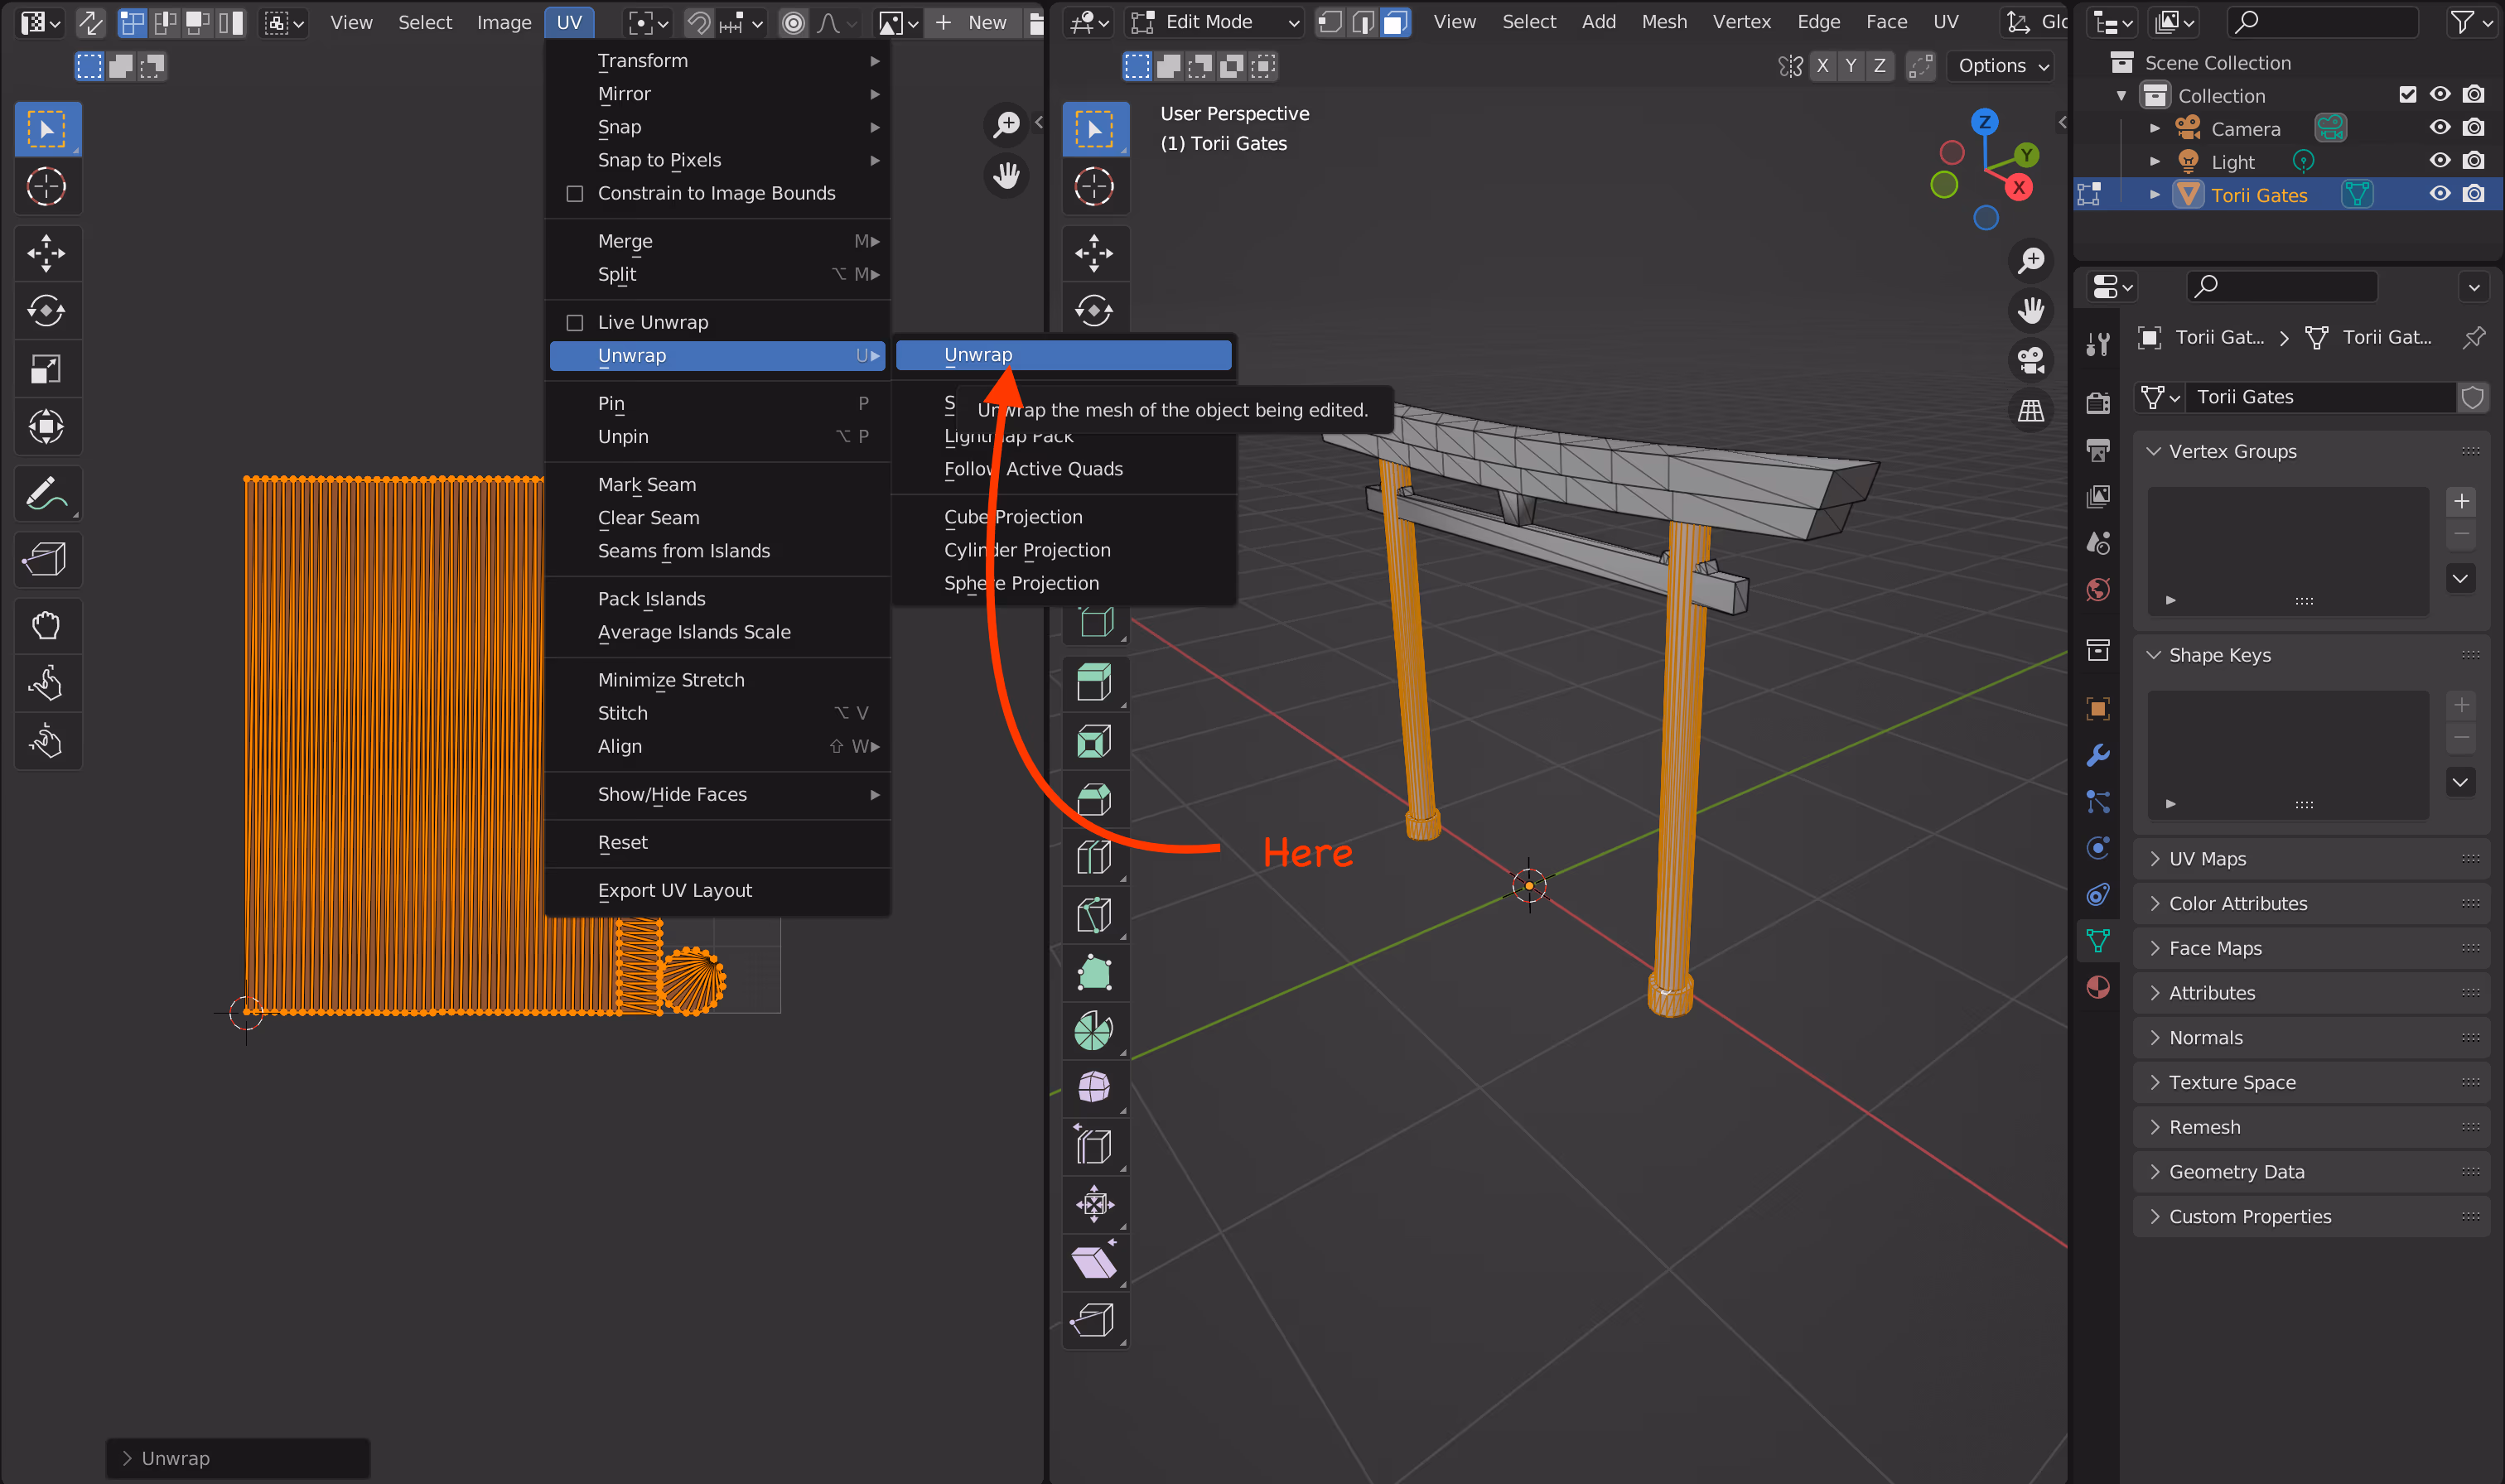
How to add image textures
To add an image texture, you first need to unwrap the selected faces. This is to avoid stretching of the texture. After unwrapping, you can apply the image texture.
Adding textures to splines
In curved splines (a cylinder with one or more curves or 'turns'), the UVs will also be curved after you unwrap them. For these shapes, you'll need to take additional steps if you want to apply a texture image.
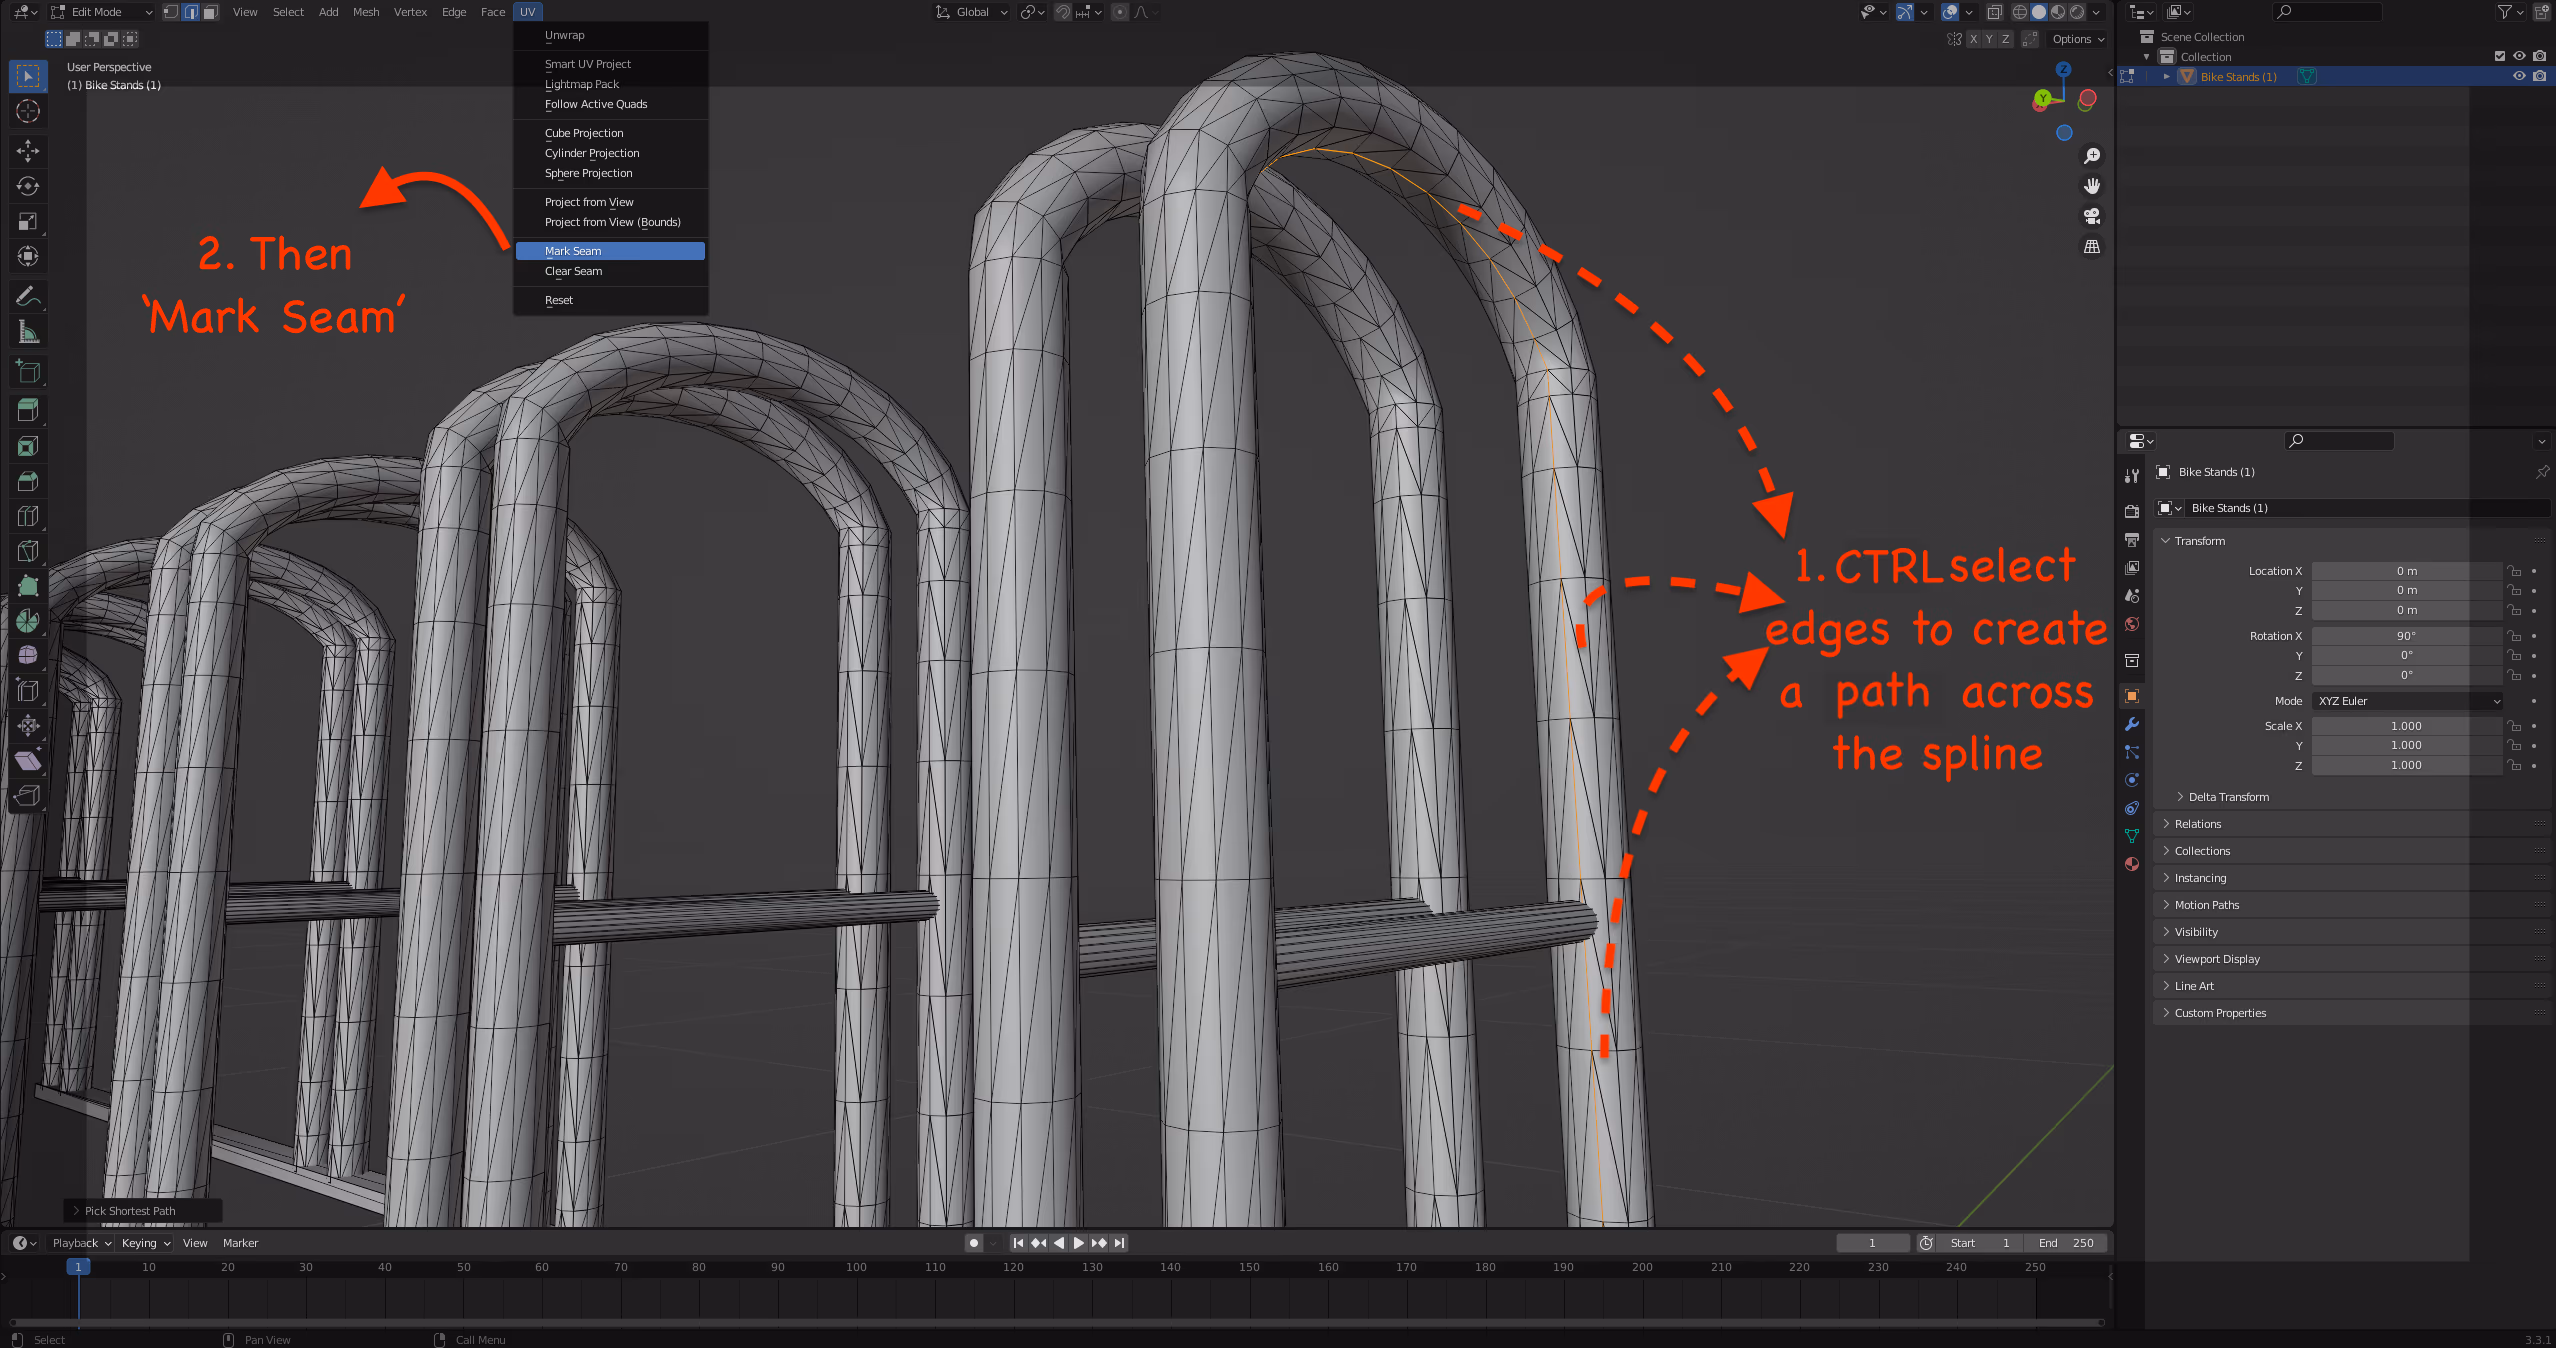
Create a seam
- Go to Edit mode
- Select multiple edges in the center of the spline.
- Left Click+CTRL (PC) / Left Click+CMD(Mac)
- Blender will automatically connect those edges with the nearest path together.
- Click UV ➝ "Mark Seam"
Unwrap it
Then unwrap the spline and Blender will (relatively) neatly unwrap using the seam.
Now you can apply a texture image and it will be evenly placed (with perhaps some minor stretches).
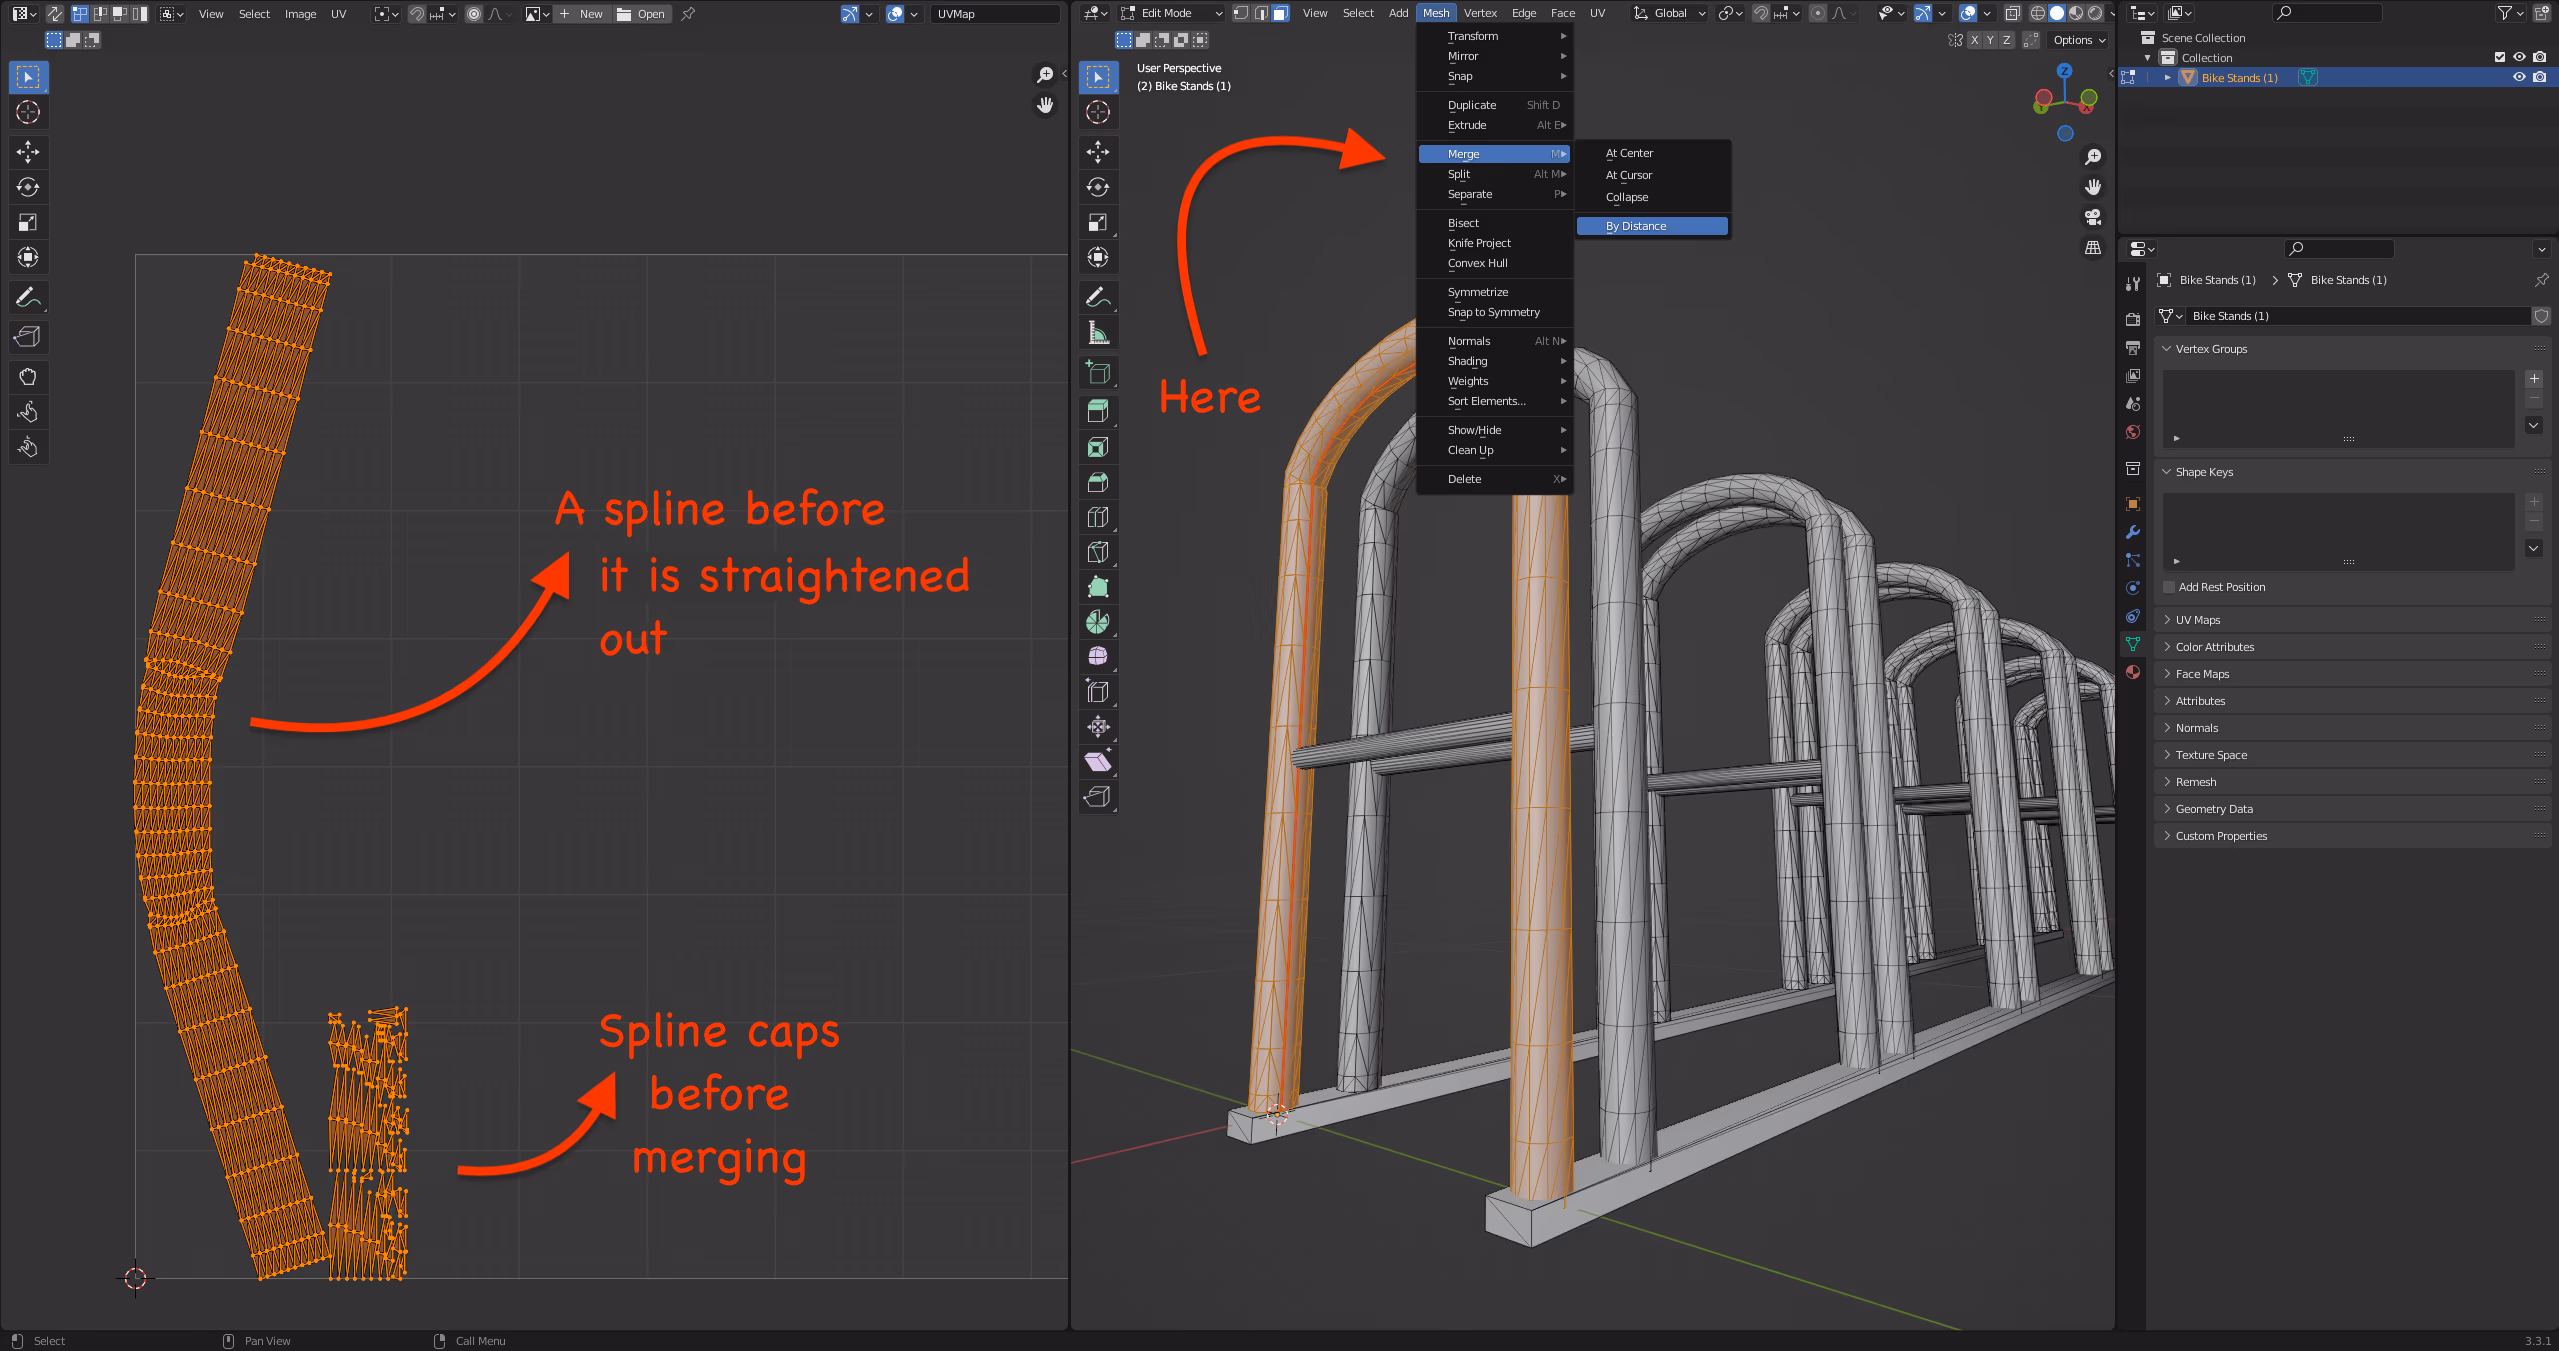
Adding textures to the caps
Ao add textures also the end and start caps, you'll need to merge the mesh by distance, because the triangles on the caps are not merged.
In the picture below you can see the spline UV before it was unwrapped and the caps UV before it was merged.
Go to:
- Mesh
- Merge ➝ By Distance
Conclusion
And that's it, you're all set!
We are working to improve our UVs and specifically improving the spline UVs.
There aren't many Sloyd models using splines right now. If you have one or two of those splines in a model it is an inconvenience, but if you have a model with many splines it could be really time consuming. In this case, consider using procedural texturing (shader nodes) or texture painting.